Meteor Sunglasses
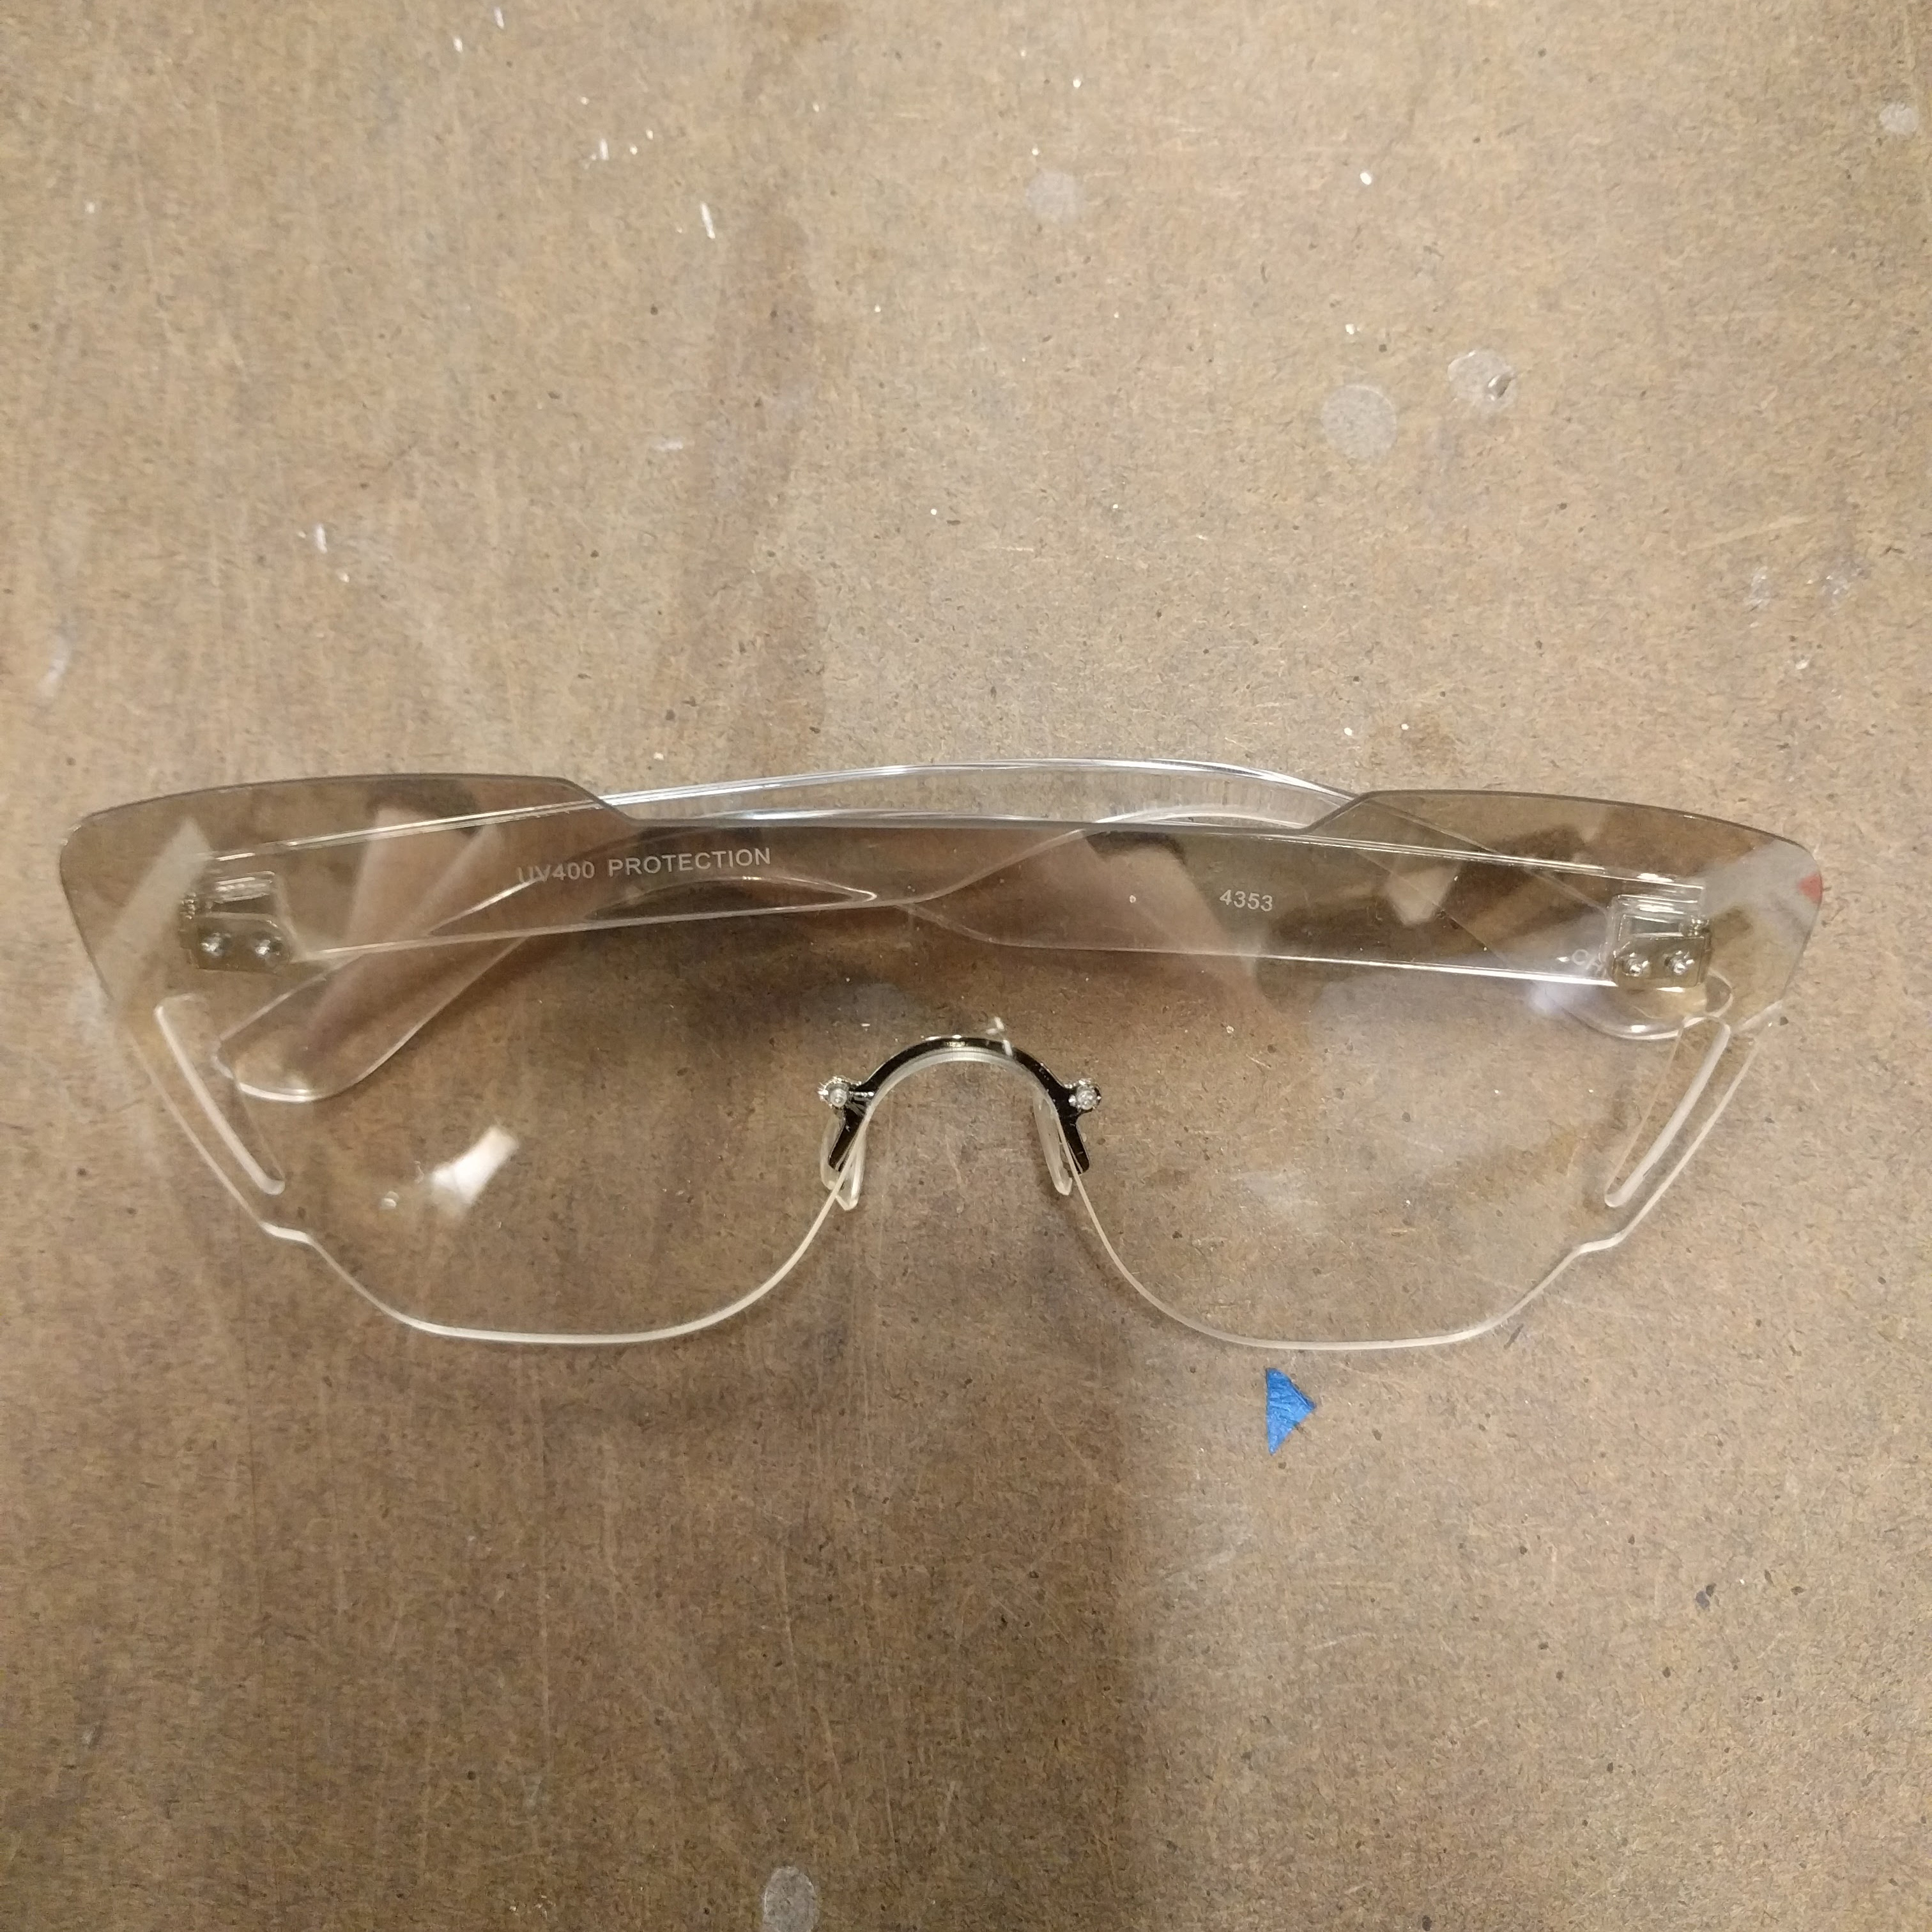
 I really love sunglasses, especially ones with colored lenses, so I thought this would be a good idea for laser cutting. I decided the lens part would be made out of acrylic; however, I had more trouble with sourcing parts for the temples (arms) and nose bridge. I found some sites online where I could order metal temples with hinges attached and also nose bridges with nose pads. Unfortunately they take at least over a week to ship, so that was not an option. Then, I realized I could take apart existing sunglasses and use the temples and nose bridge as long as they are connected by screws (and not soldering).
I bought this pair of fake designer plastic sunglasses off the street and used the plastic temples with attached hinges and nose bridge with attached nose pads.
I wanted to make them actually useful, but I could not find information on how to UV treat the acrylic. So these sunglasses are for aesthetics and fun only.
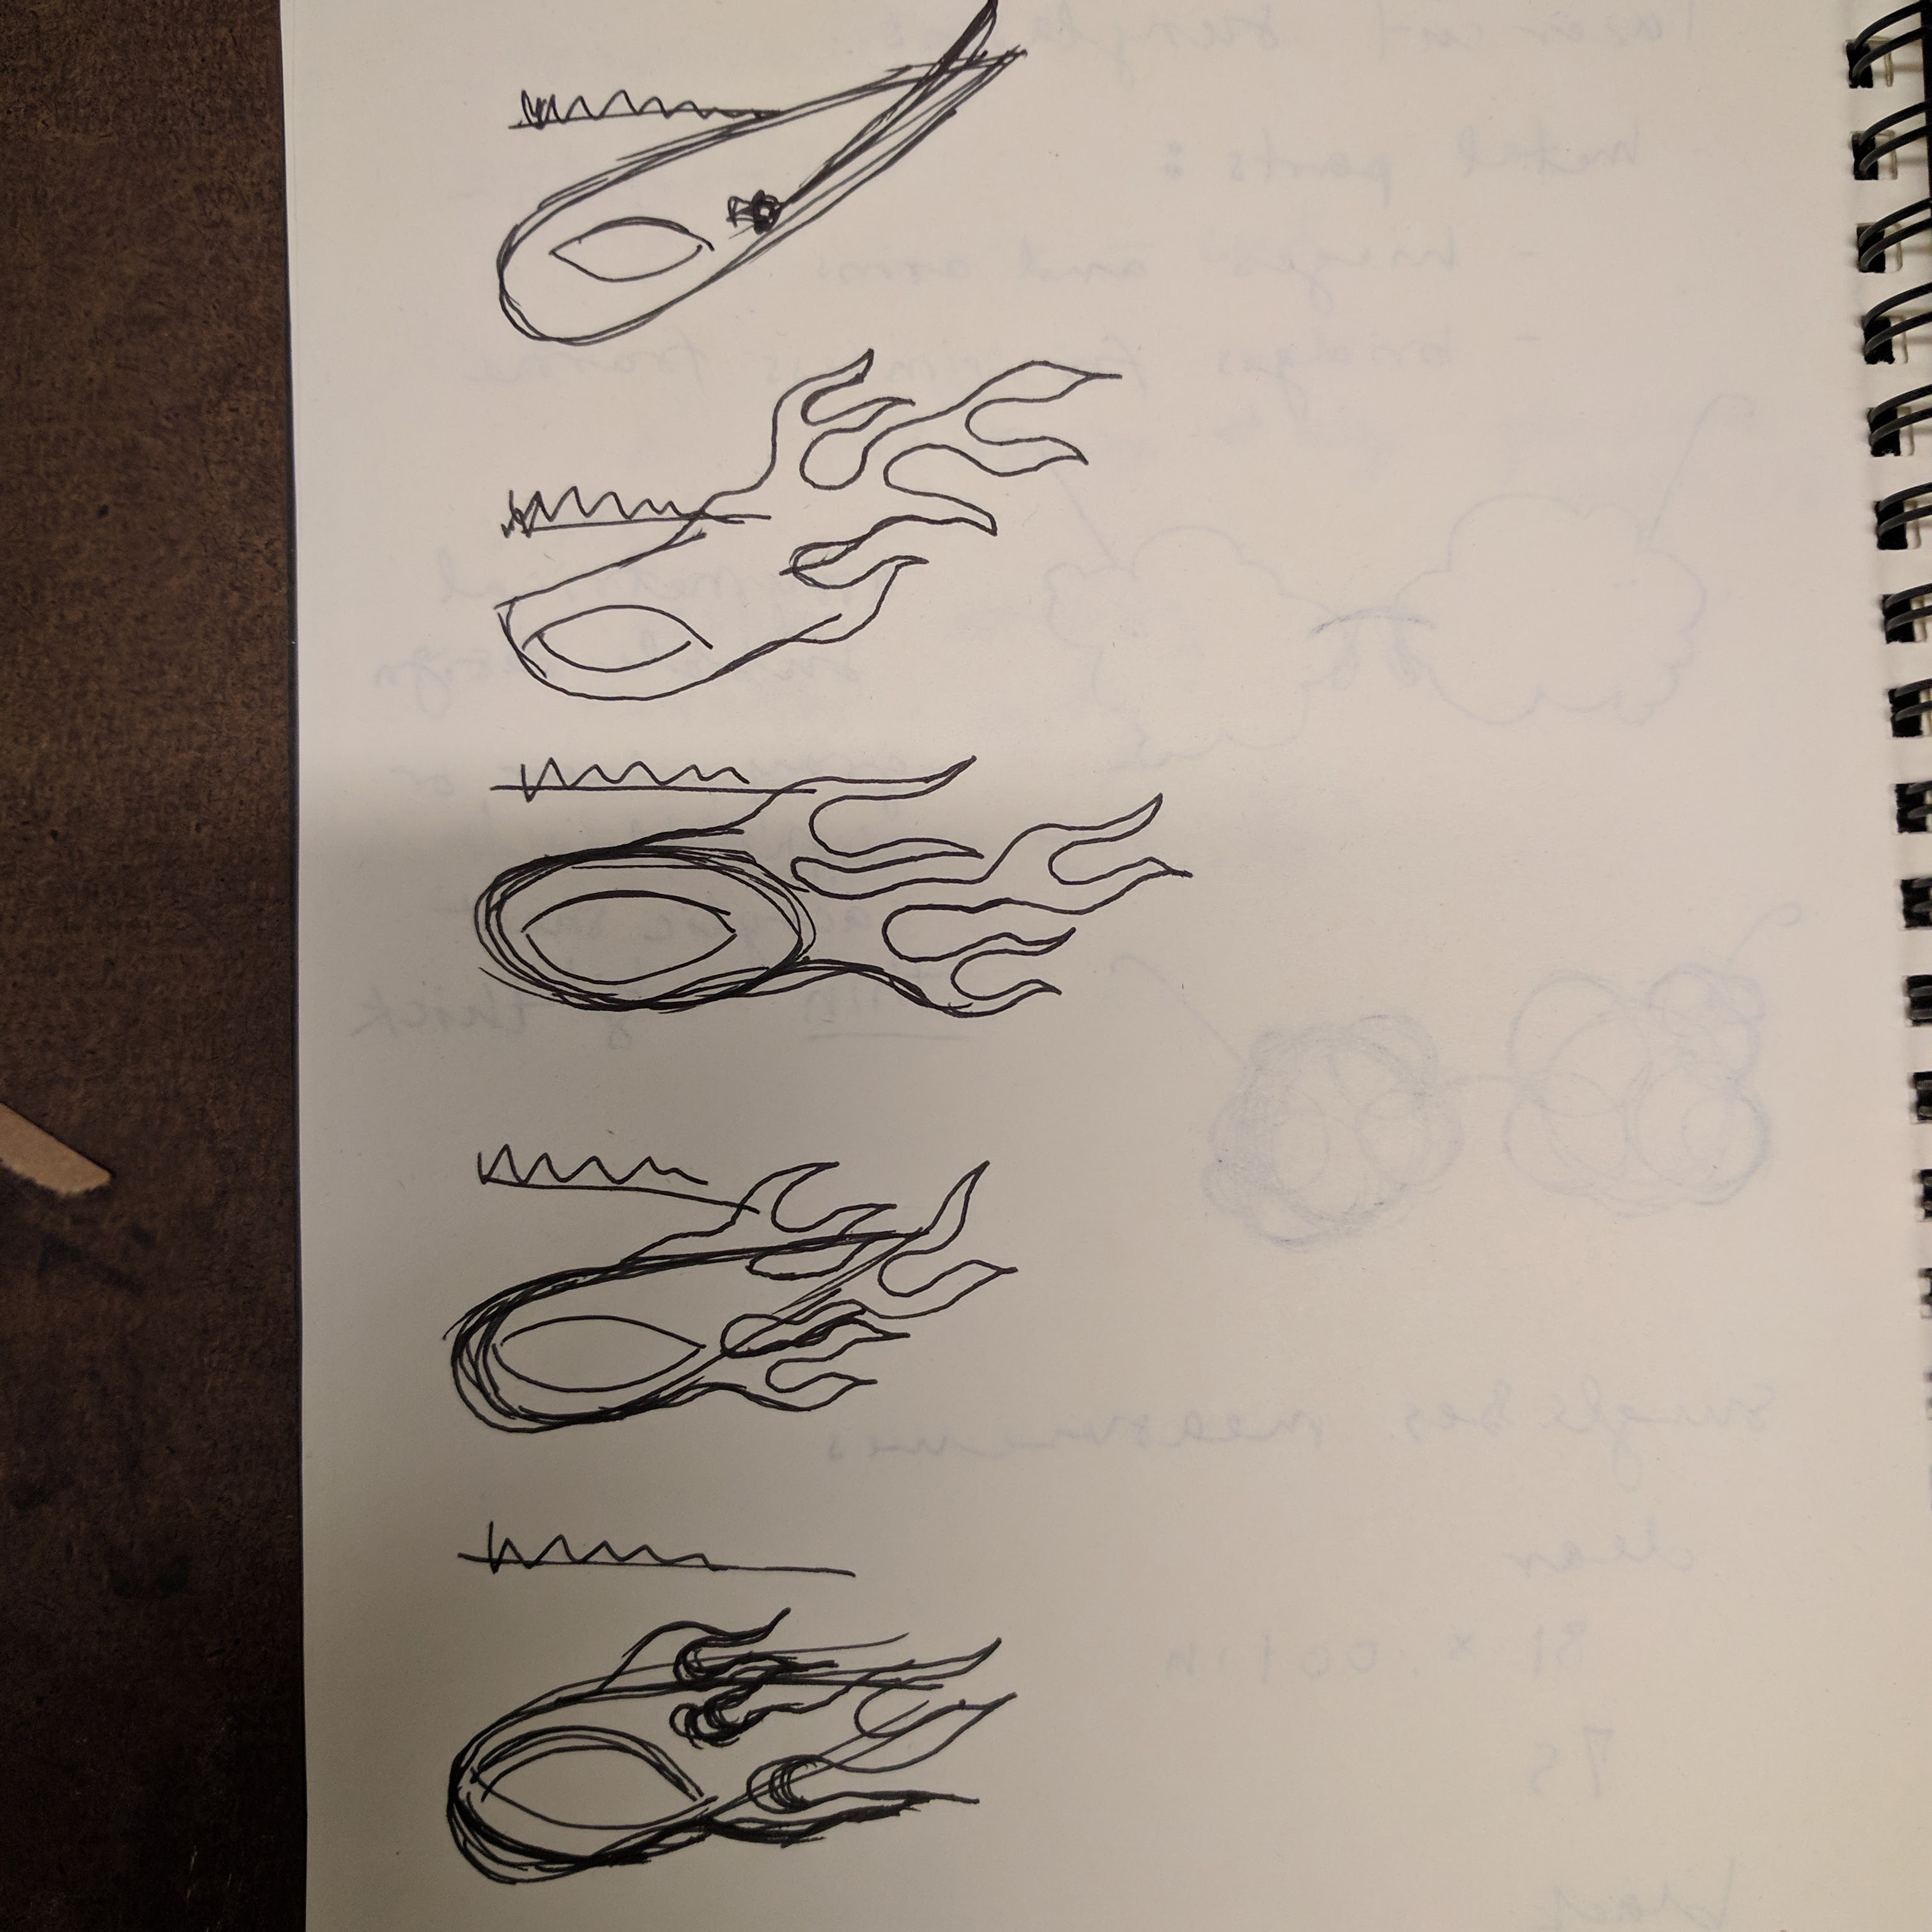
My concept was to make the lens shape look like a meteor. I drew the shape in Illustrator by tracing images of racing flames and cat eye sunglasses. The curves were drastically simplified and reshaped to fit into a shape that could go over your eyes and face.
Sketches to final outline:

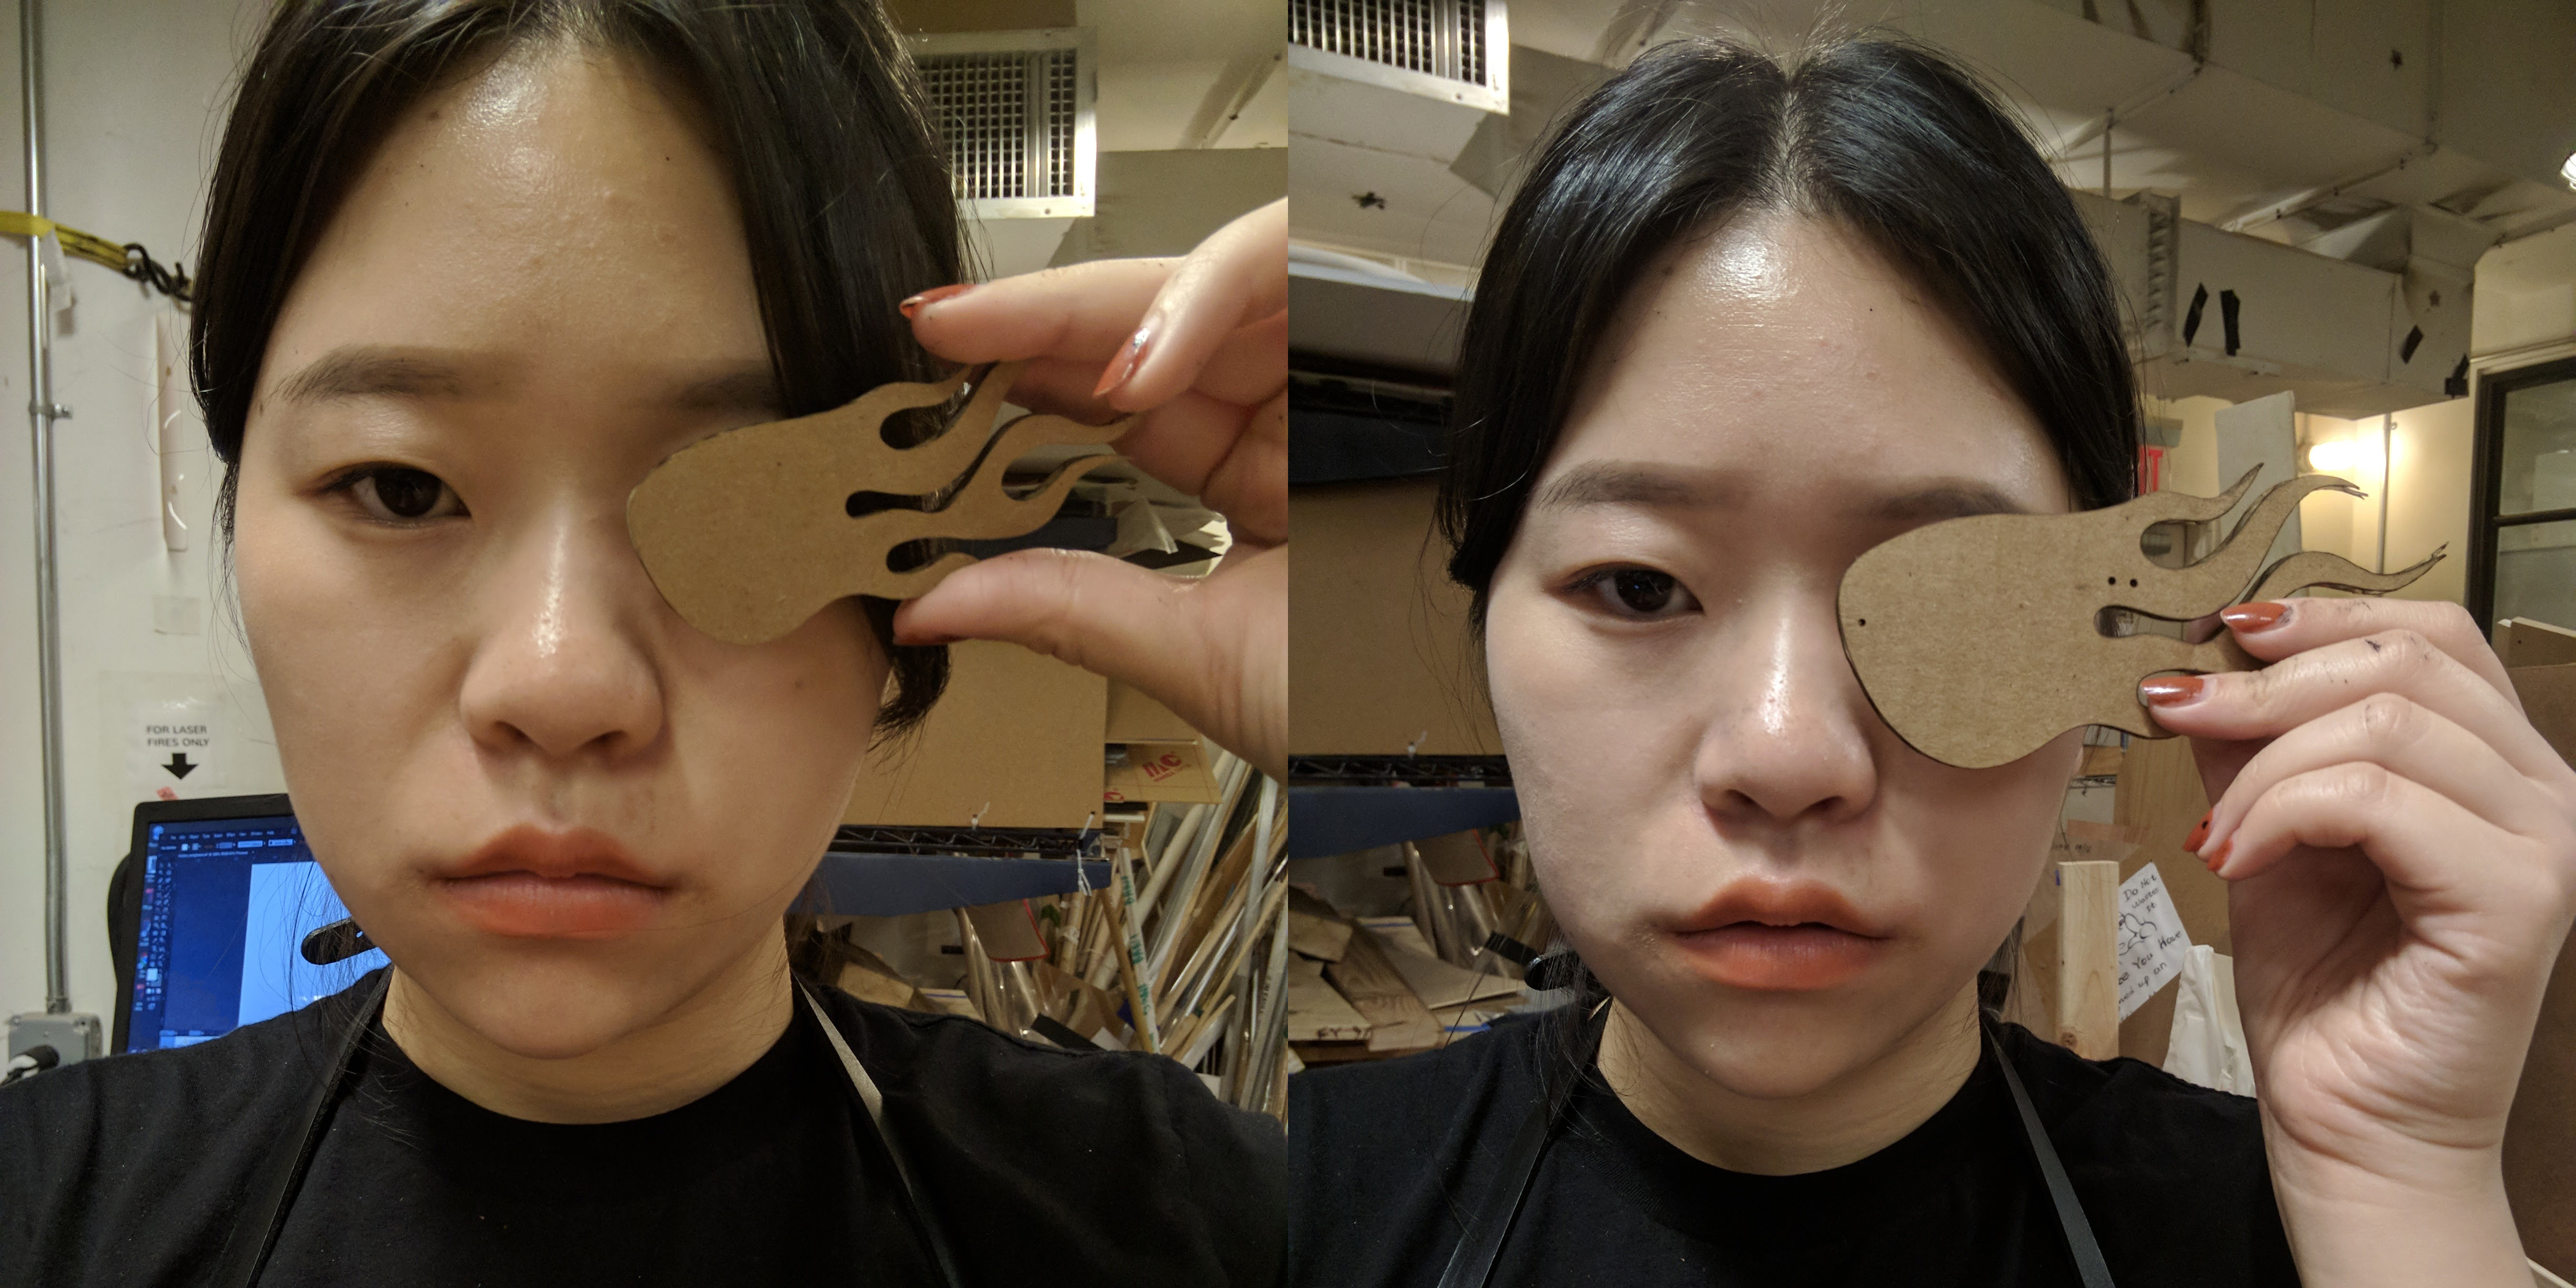
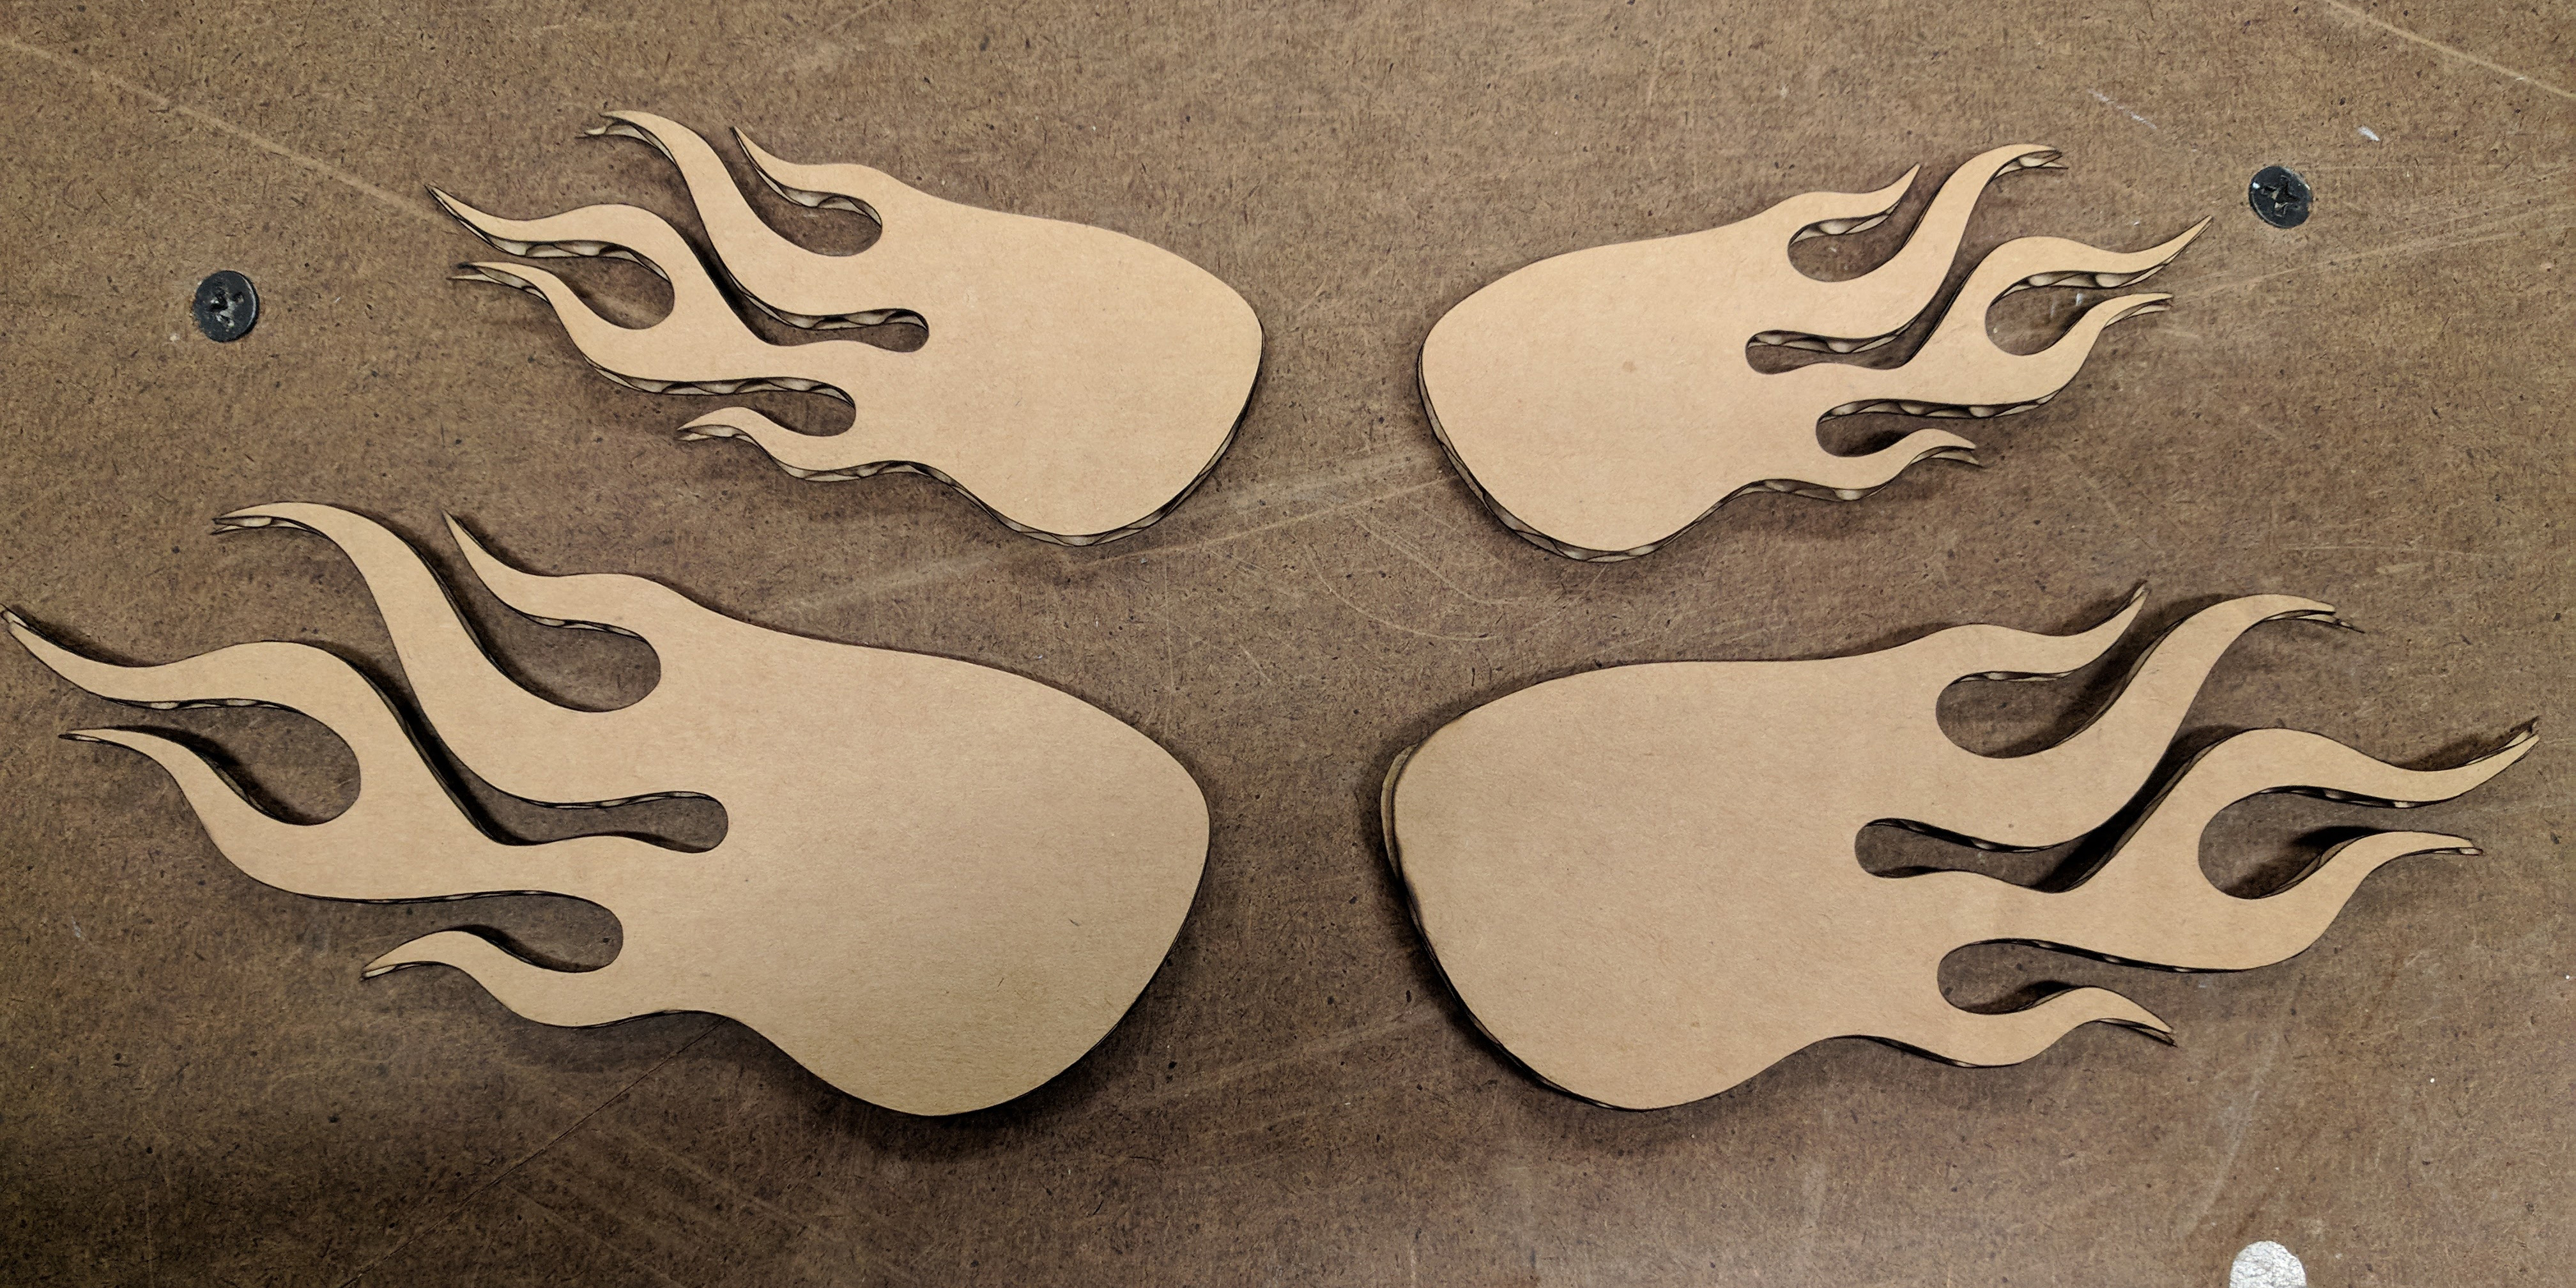
Then I started laser cutting. I used the 50 Watt laser cutter. I began by testing my design with cardboard. By holding it up to my face and against the original sunglasses I bought, I found that it was too small. I enlarged the design by 1.5 x and recut it; this was the perfect size.
I then continued to use cardboard laser cuts to figure out the placement of the holes for the screws. I placed the cardboard over the original sunglasses to see where the screw holes would line up and drew circles in Illustrator where I wanted the temples/bridge to be connected. From measuring the hinge, I knew how far apart the 2 screw holes for the temple arm had to be. I then laser cut this into cardboard, tested with the actual screws and metal temples/bridge on the cardboard, and adjusted as I saw fit before test cutting again.
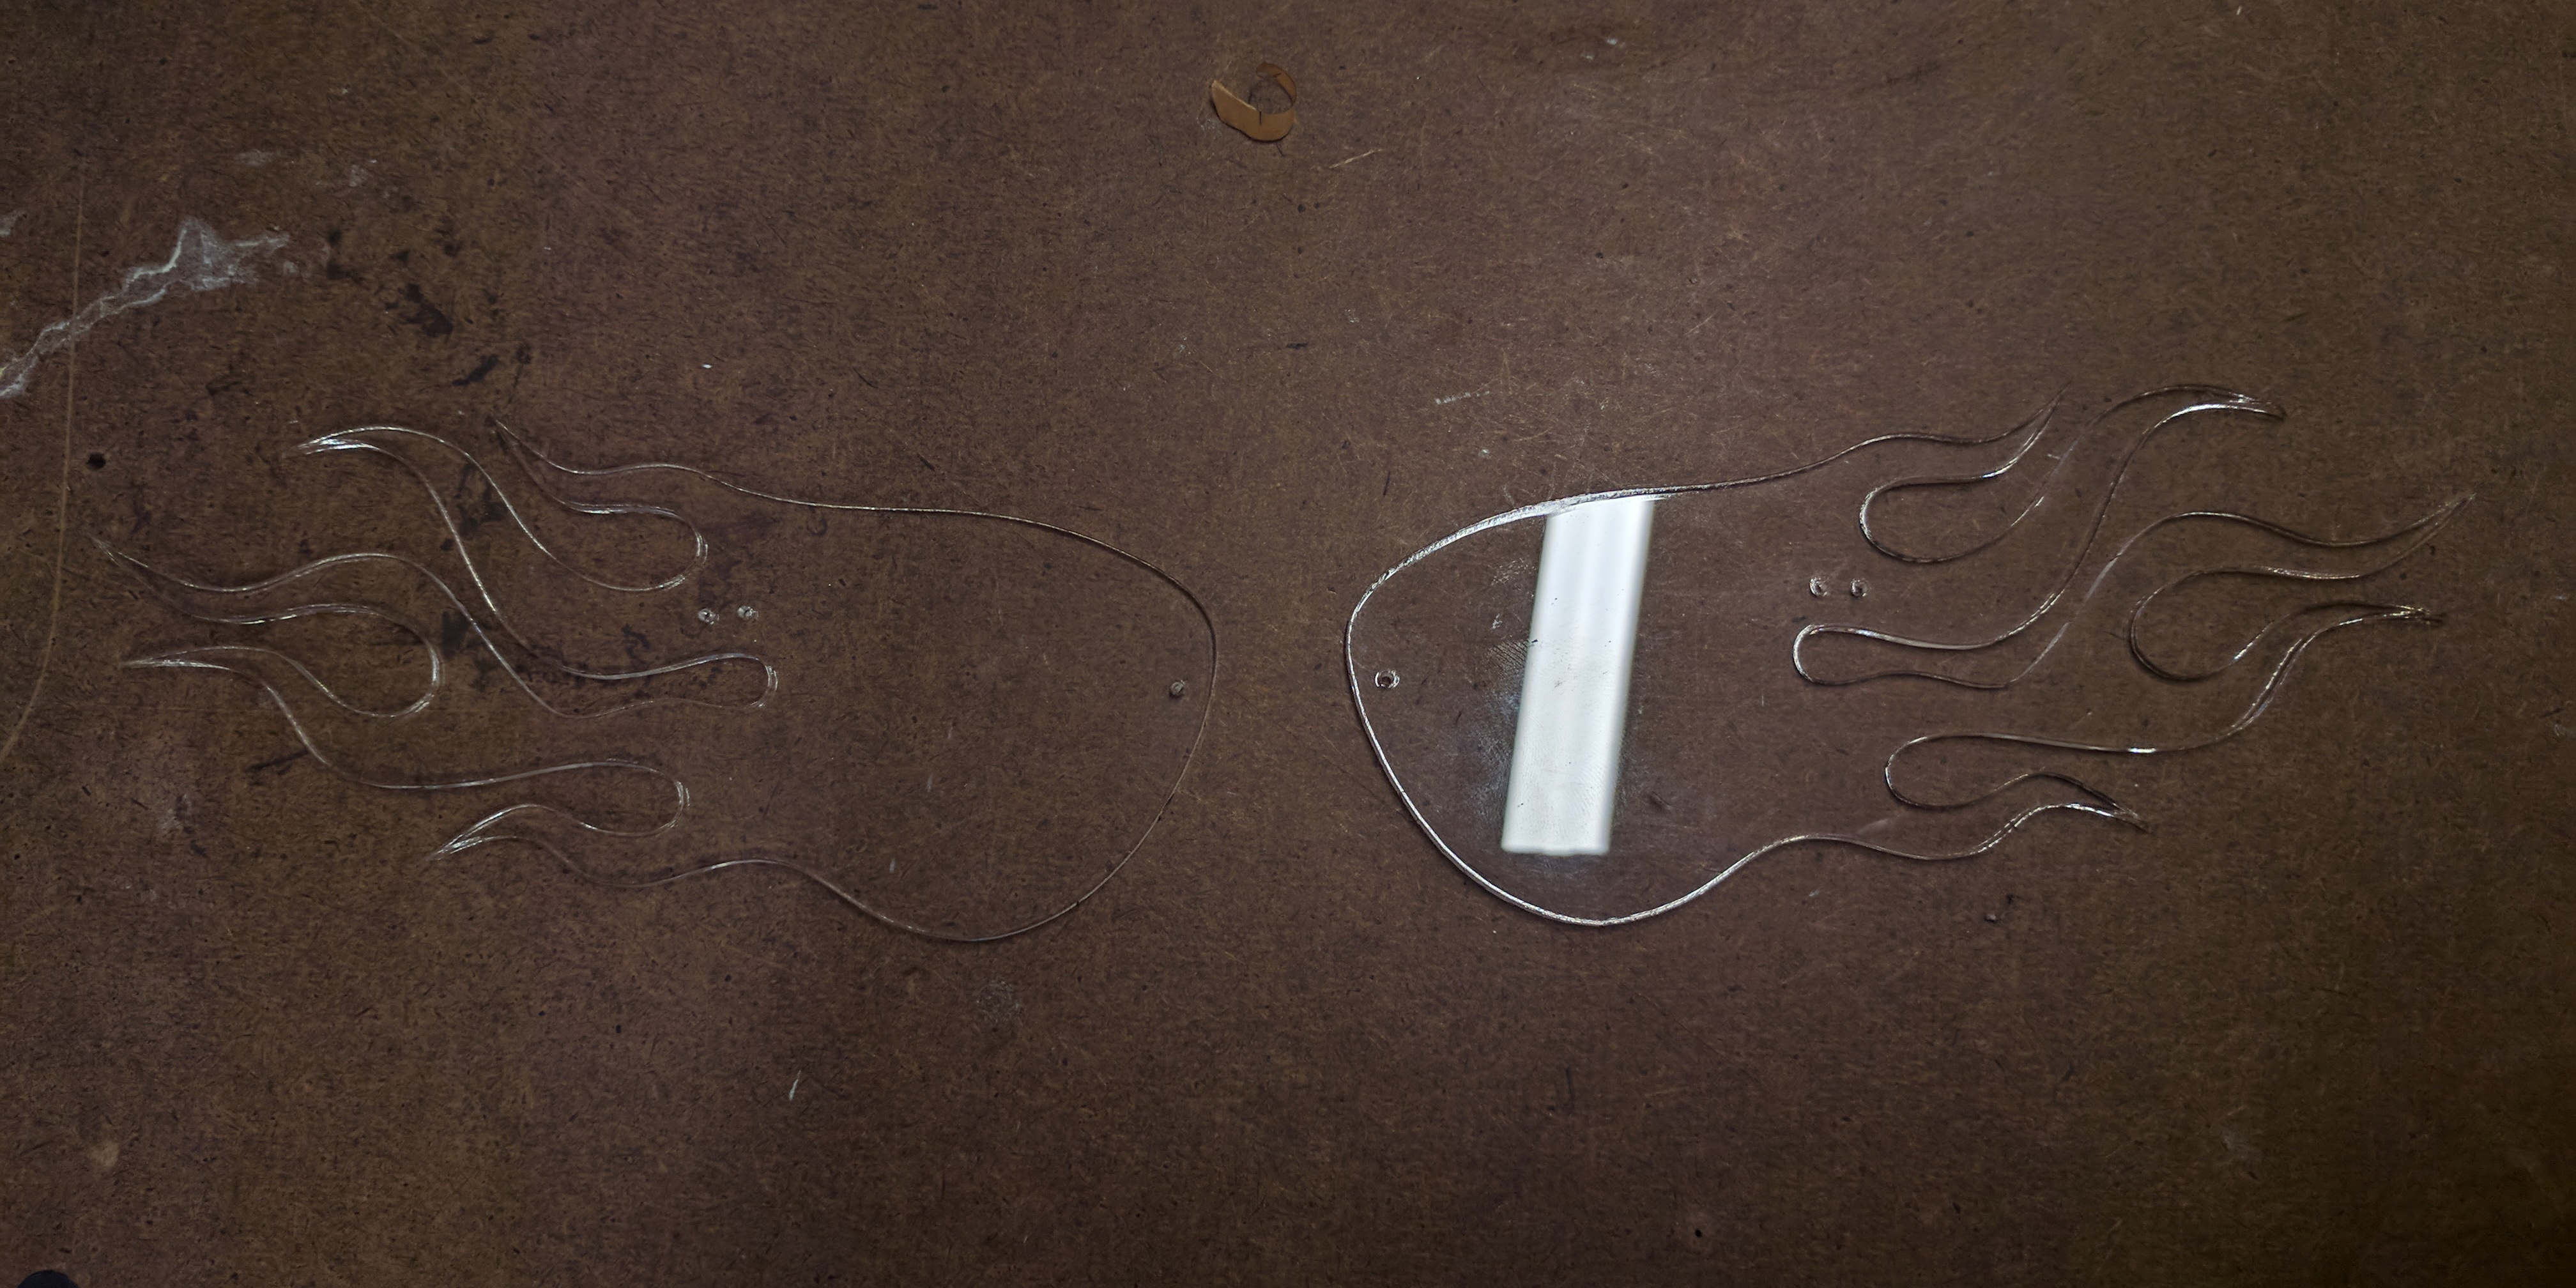
After I was satisfied with the size of lens and placement of screw holes, I cut into clear acrylic as a test since it is cheaper than the amber acrylic. I did all my cuts with the protective paper still on on both sides. I then fully assembled the glasses together.
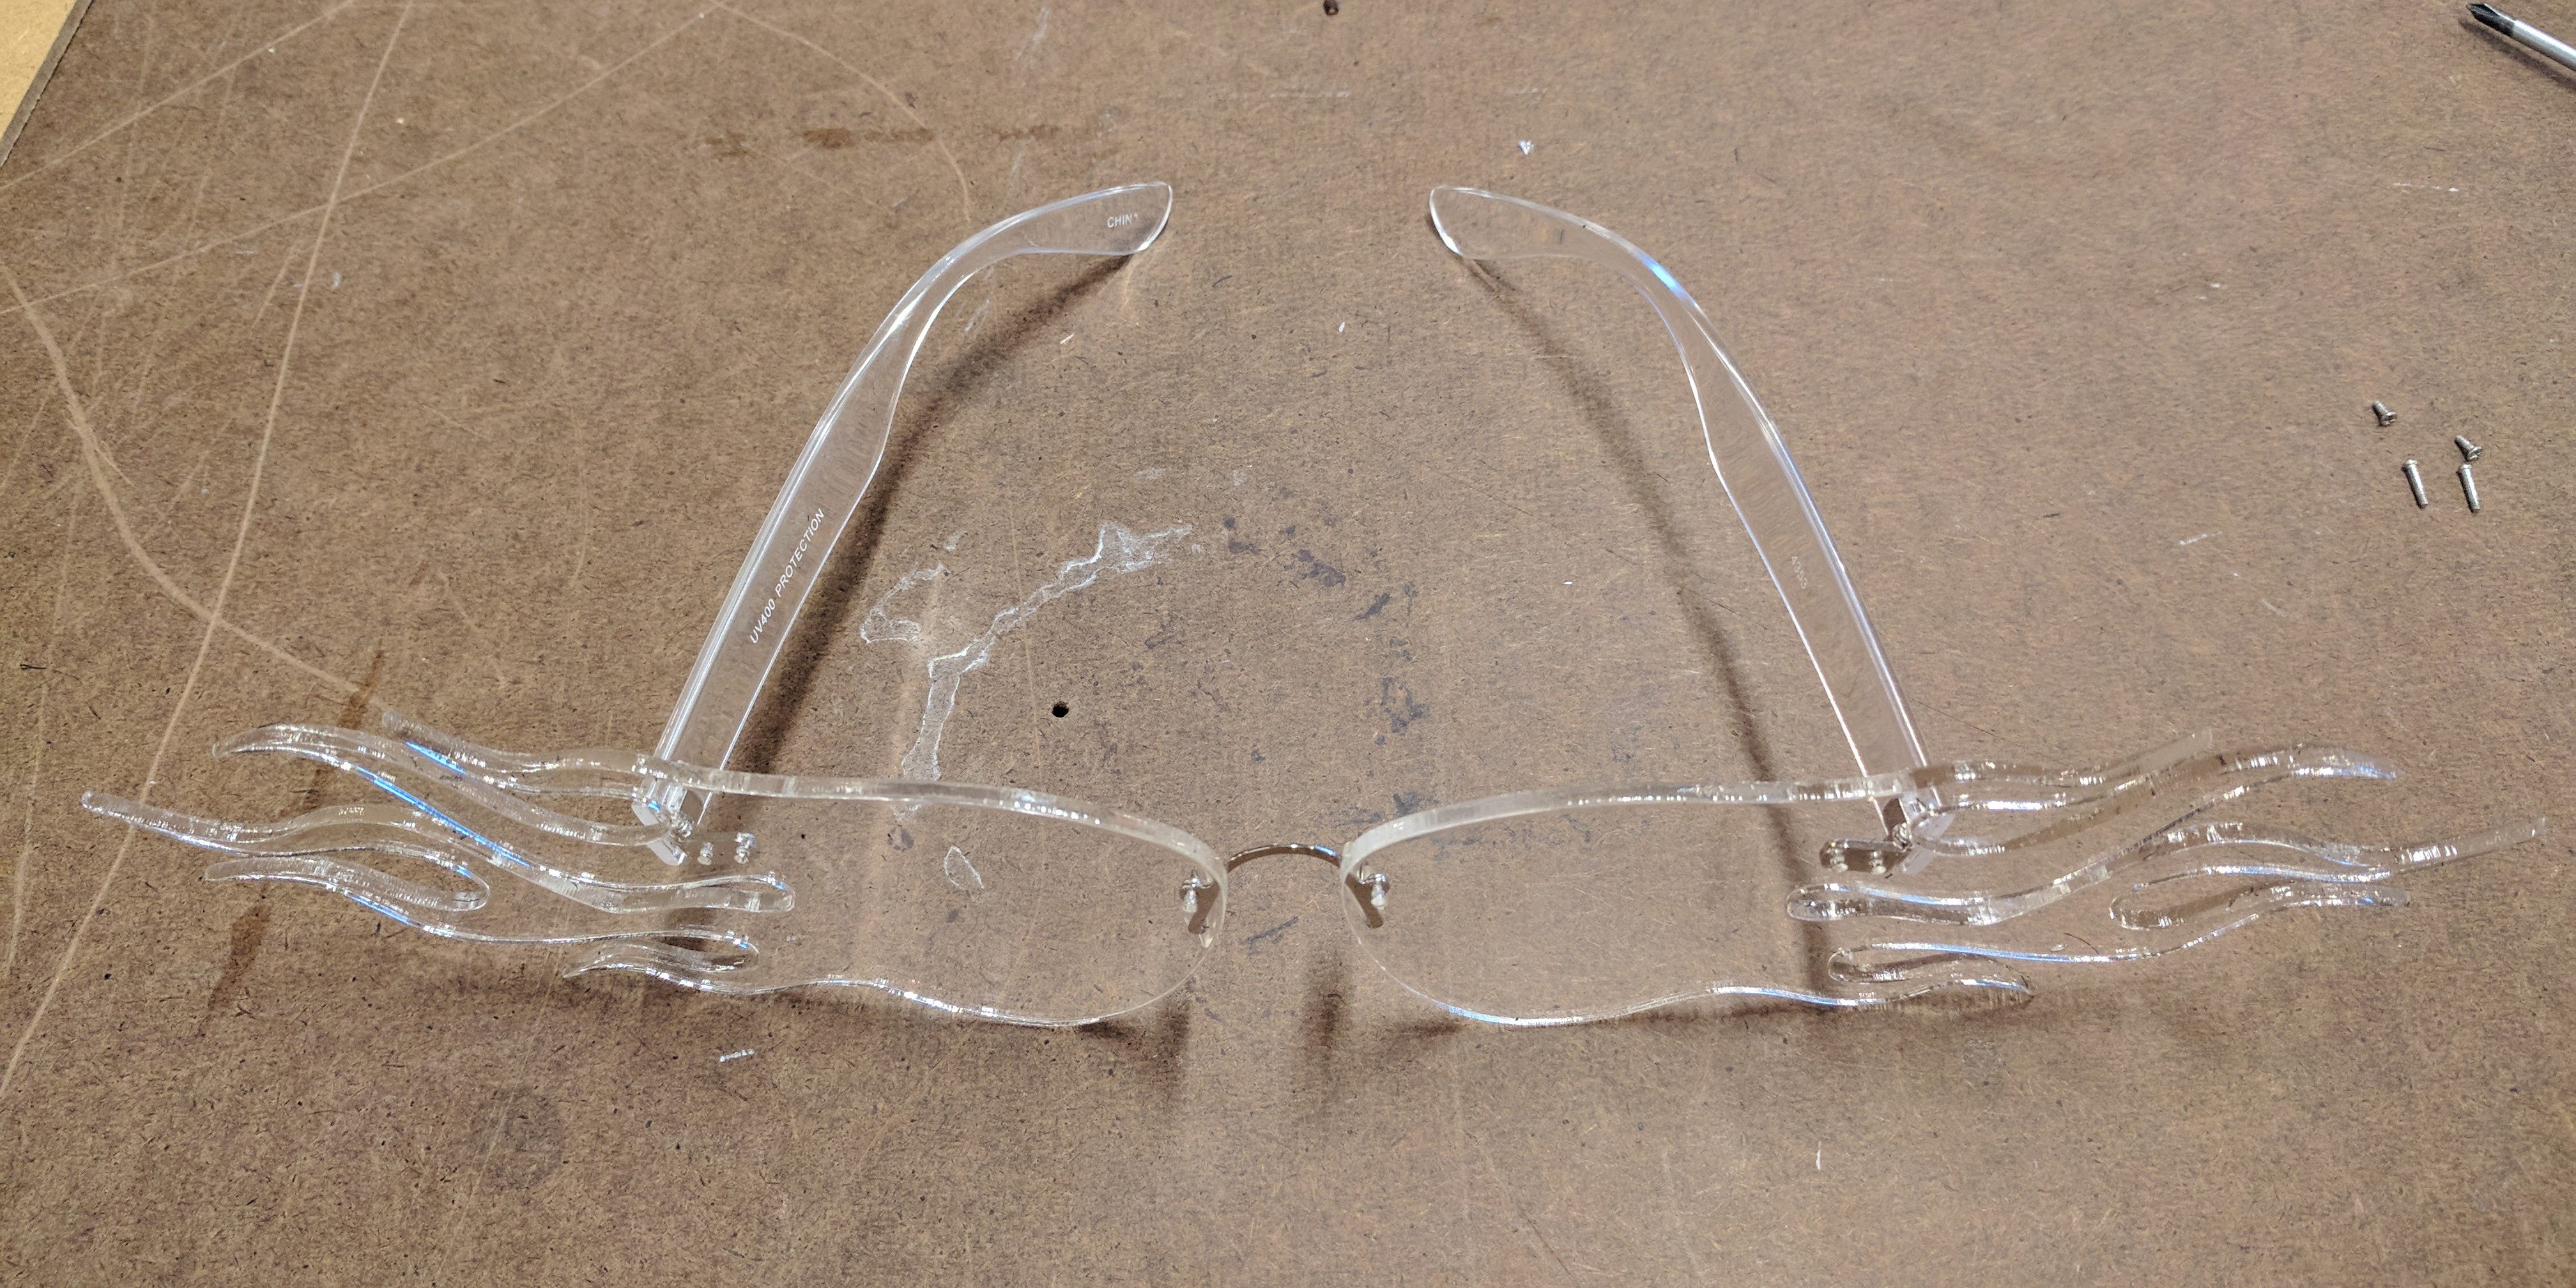
This is where I ran into a problem, since the nose bridge only has one screw hole on each side and the acrylic is slippery, the screws rotate in the hole and do not hold the lens at the angle I wanted. The original sunglasses’ lenses were one piece of plastic so it did not have this problem.
I decided to go forward anyway with cutting the amber acrylic and use glue (E6000) to secure the screws at the nose bridge. This technique worked but does make the piece more fragile.
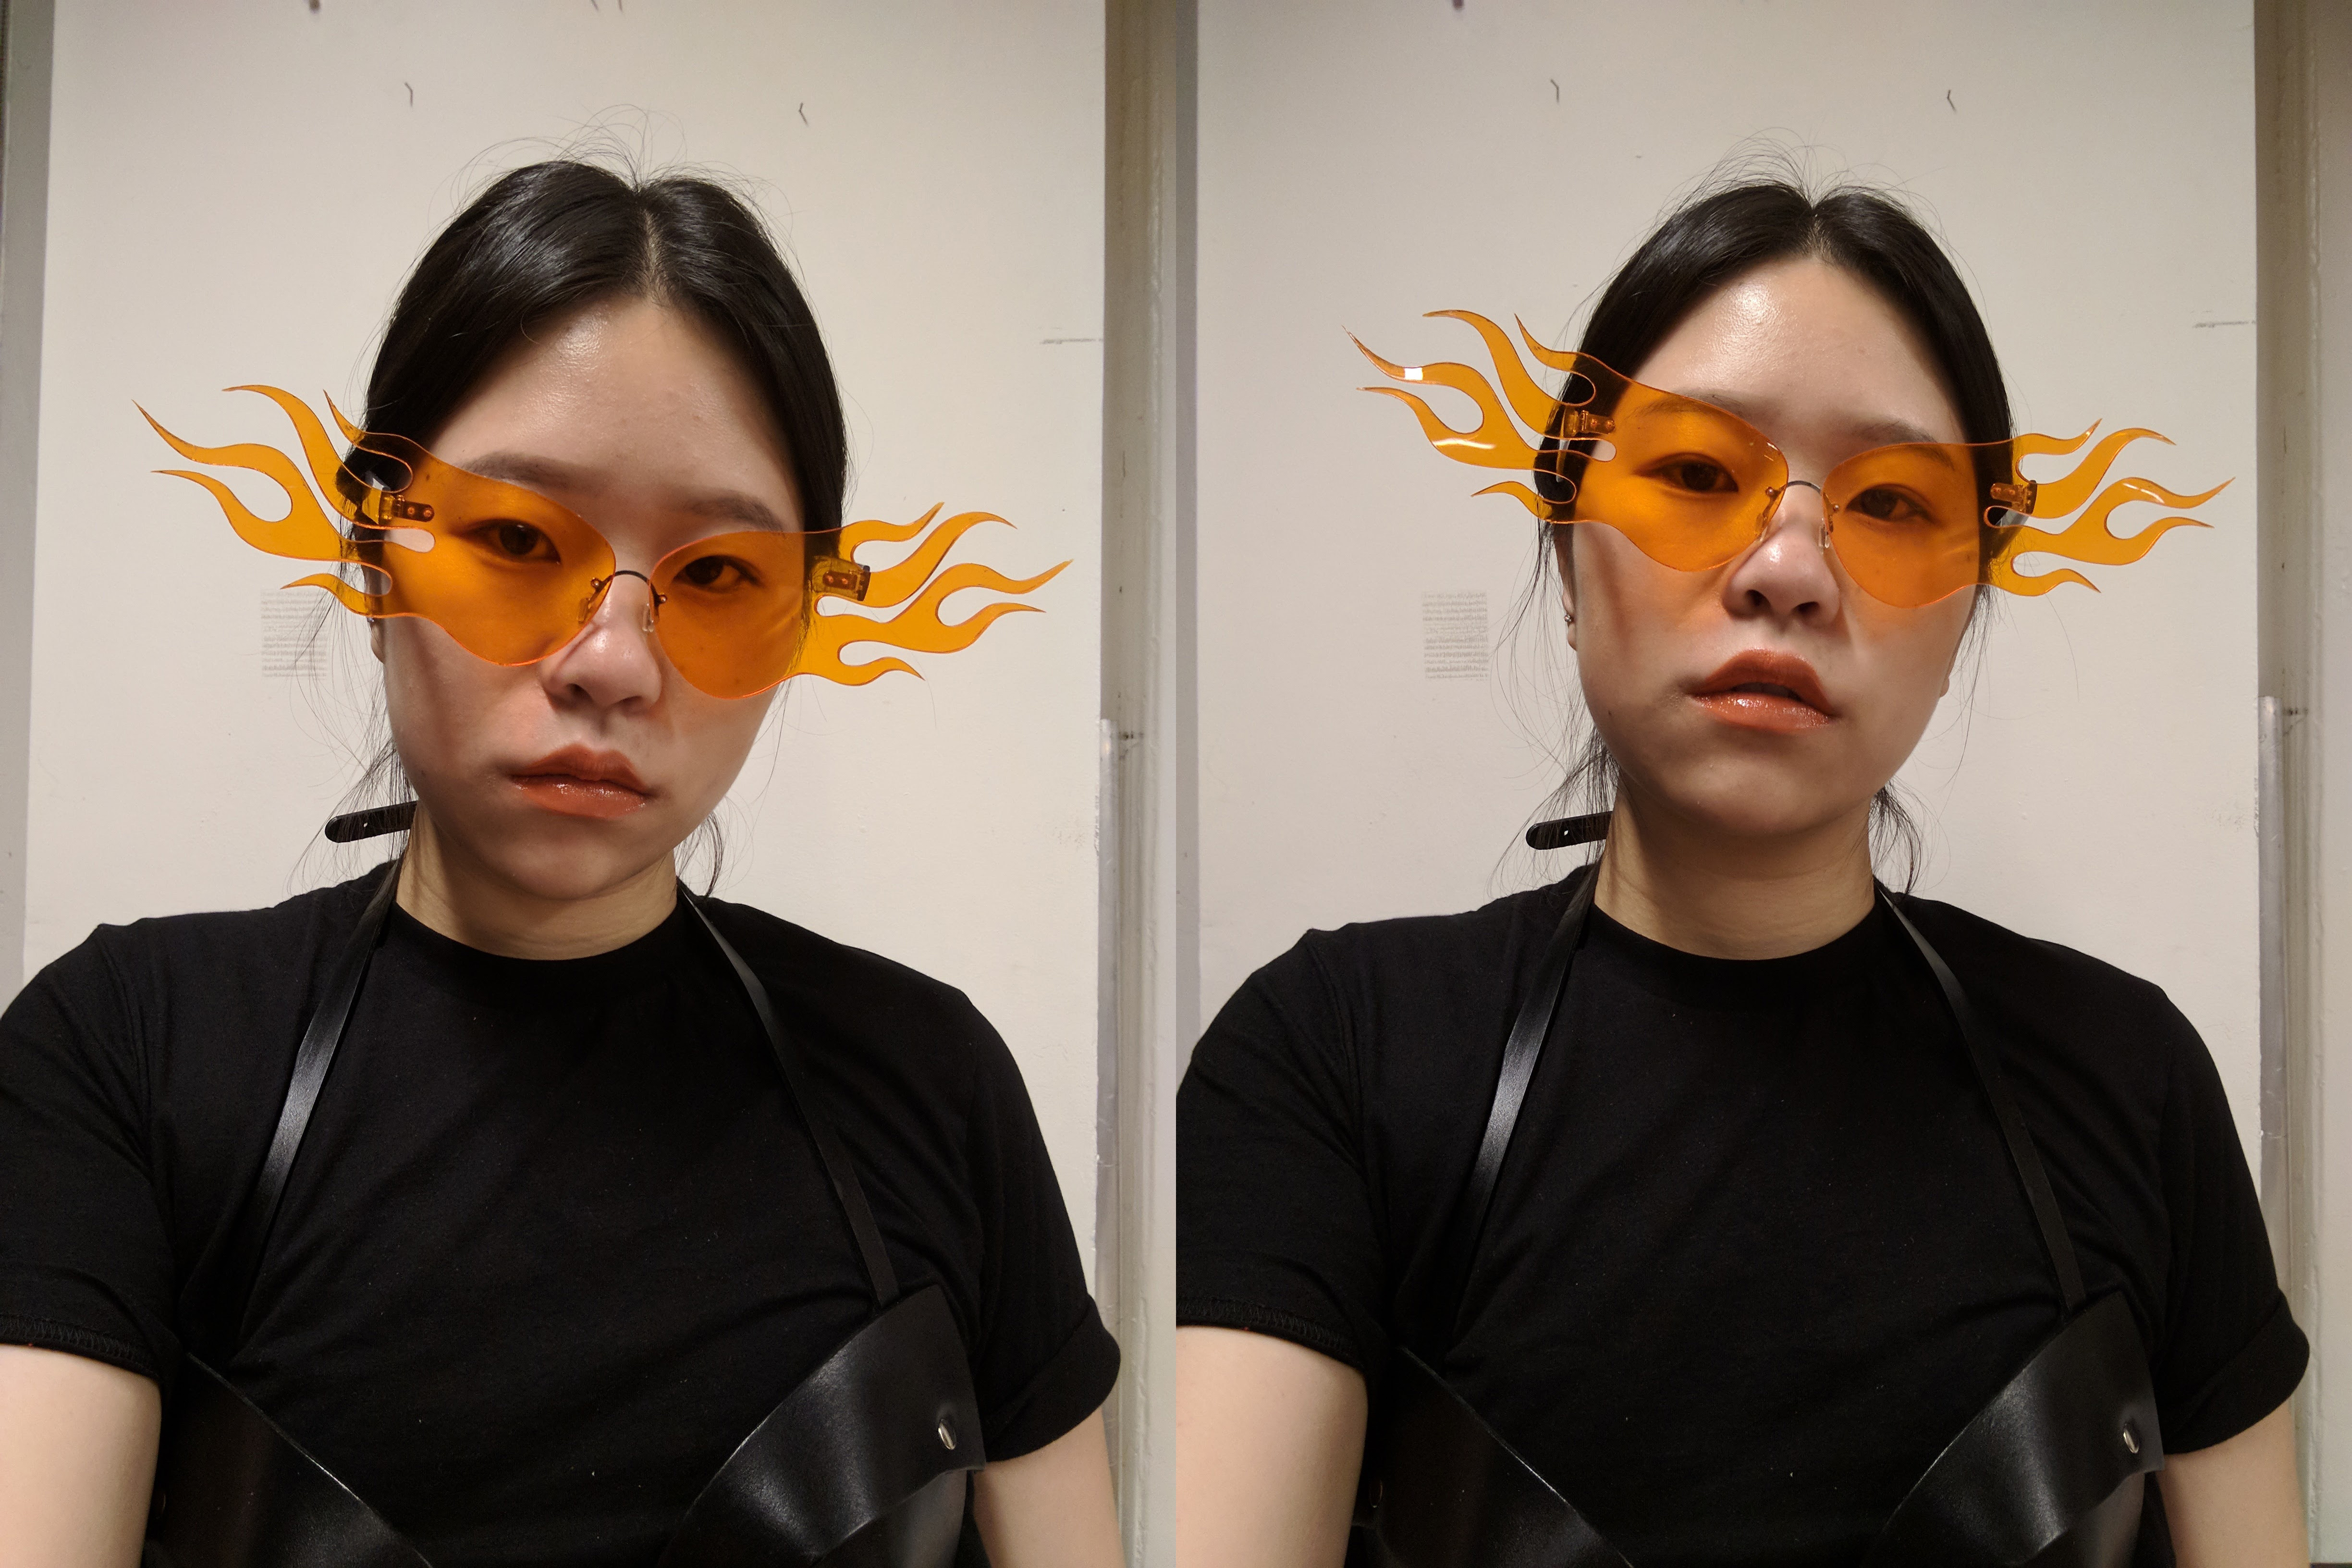
Finished product:
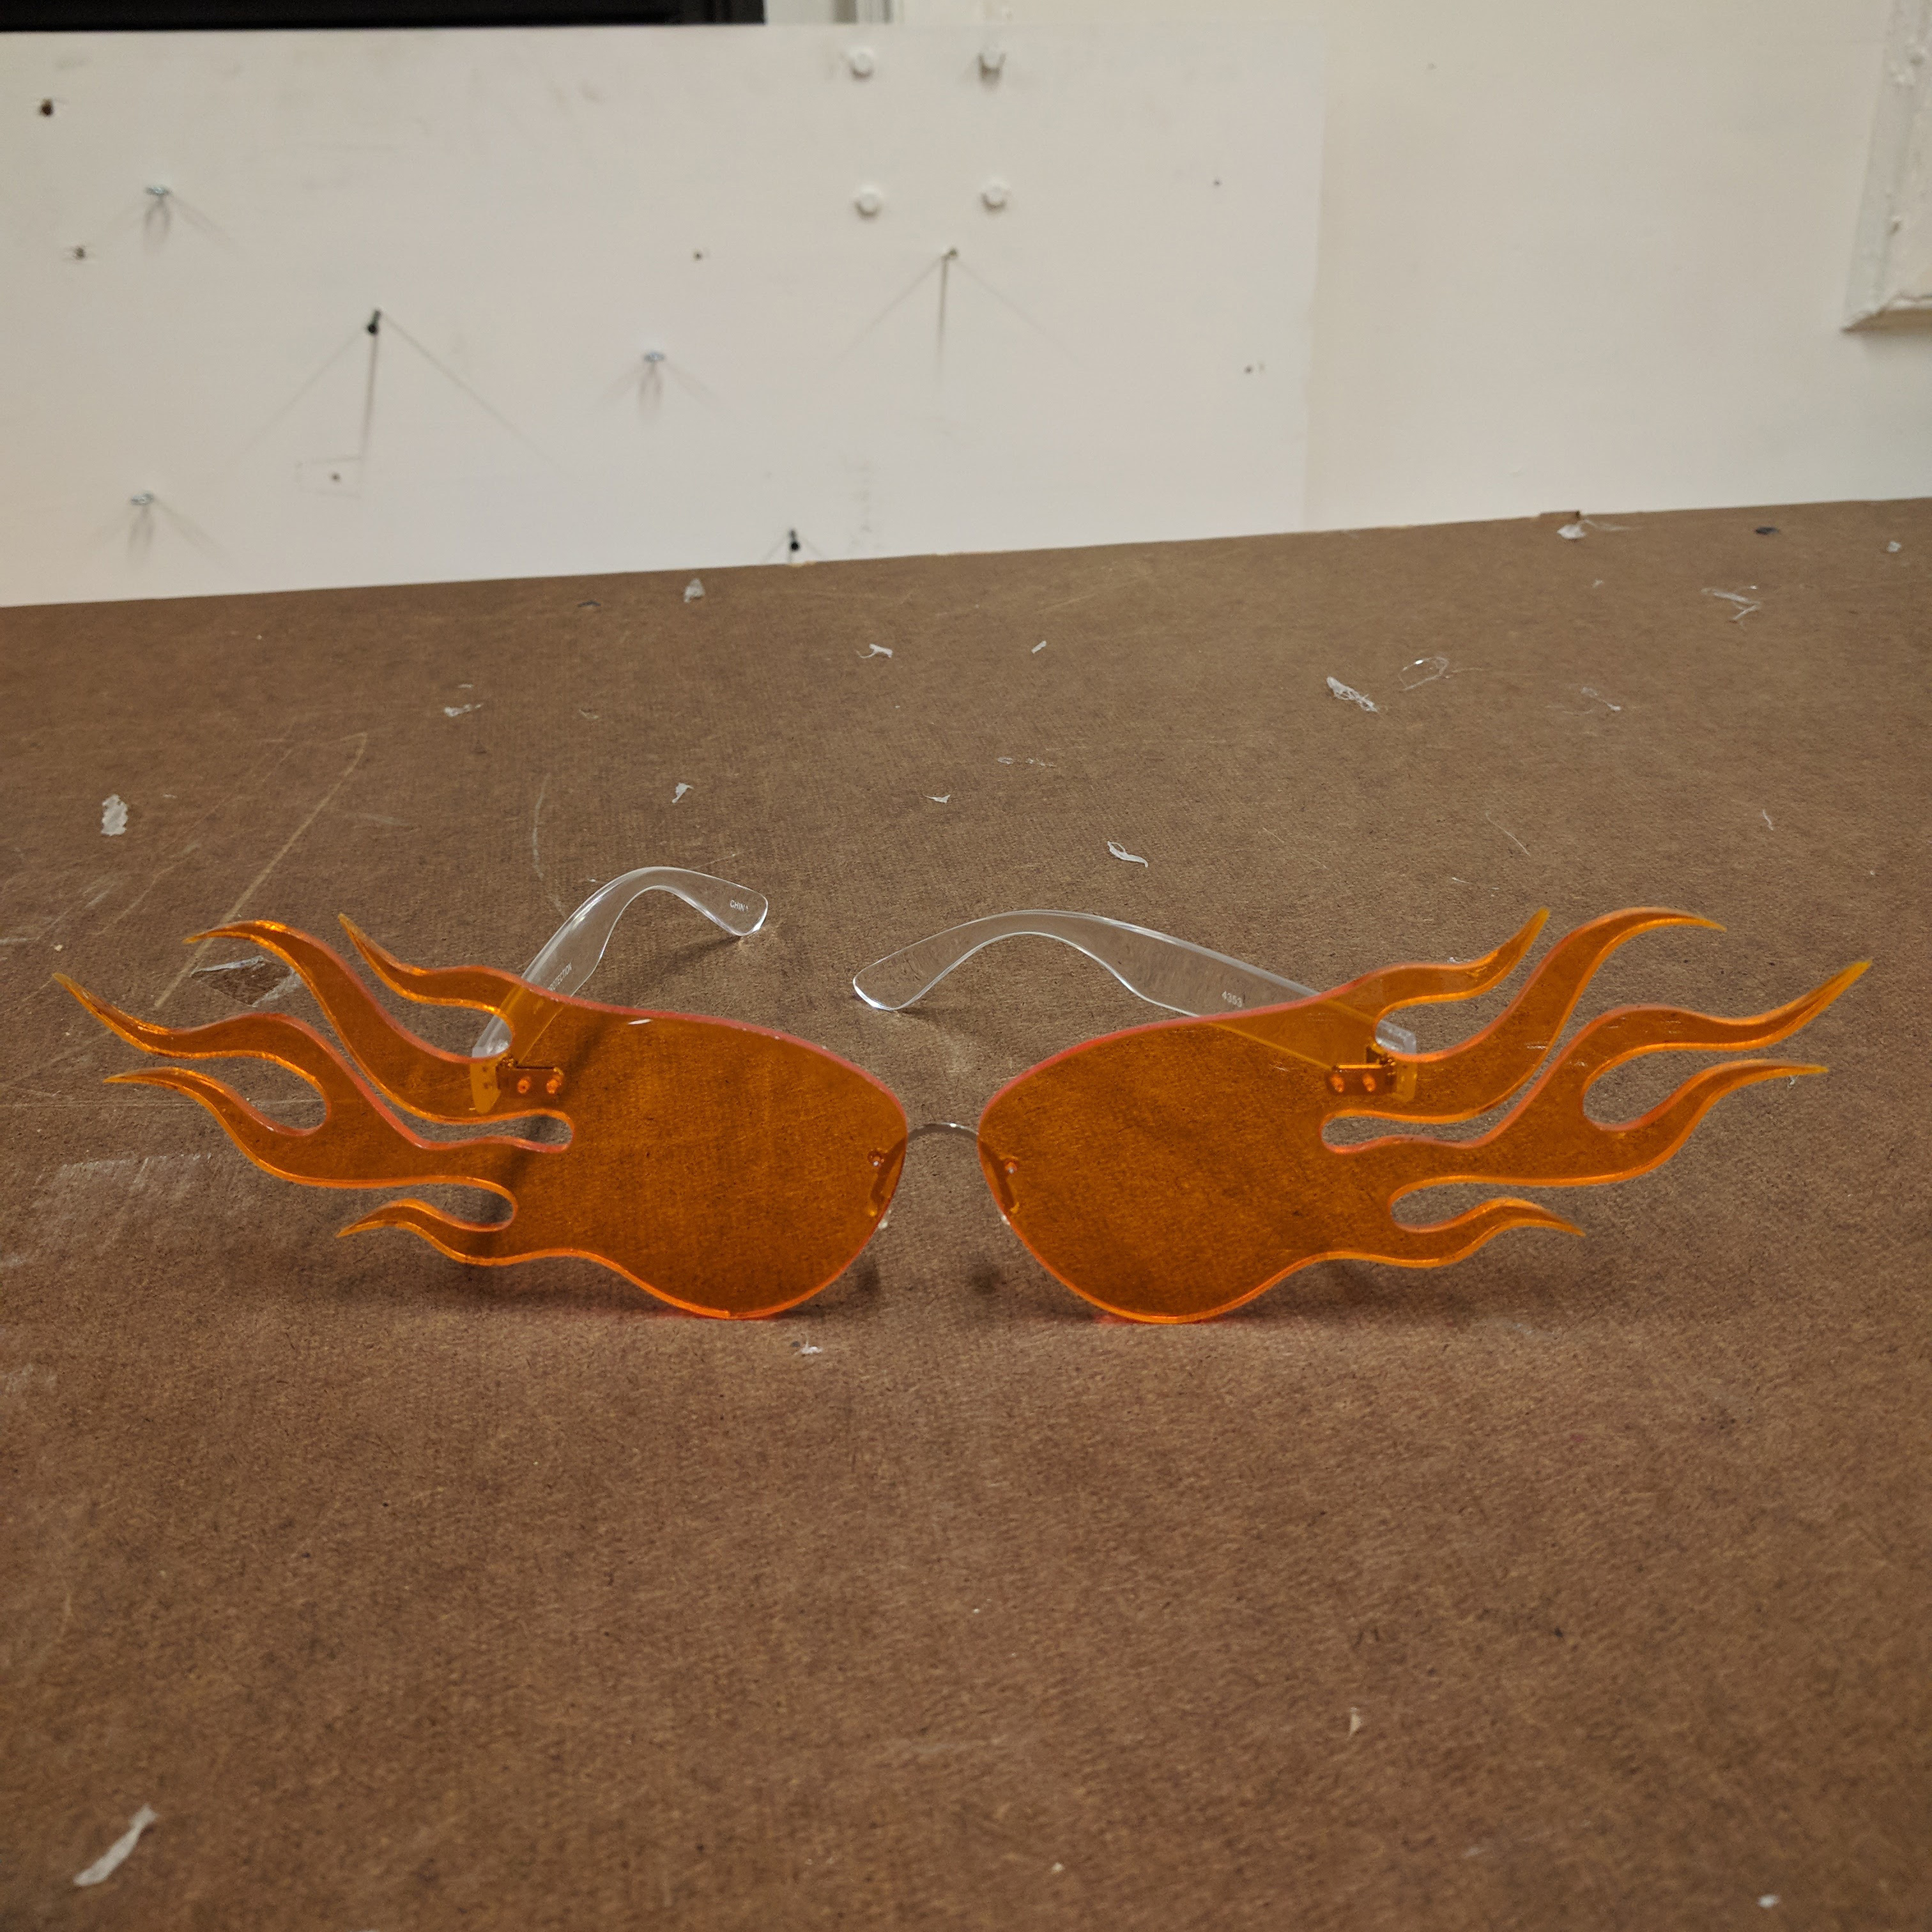
Overall, I’m proud of how this piece turned out. It is not really wearable everyday, but it achieved the look I was going for. I would haved liked to have a better choice of hardware: full metal temples, nose bridge with to screw holes, etc. This would have made the piece more polished and sturdy.