My final idea is to create a “wearable” that reacts to myself and people around me. I want to fabricate a headpiece based on a theatre curtain. A headband will support a metal track around the my head. The curtain will be attached to this track. There will be 2 directional microphones, one pointed at me (the wearer) and one pointed away. When the I speak, the curtain will close over my face, muffling my voice. If the fabric is not enough to muffle my voice, I may have speakers start to play music. When someone speaks to me, the curtain will open, allowing people to look at me and speak to me.
Interaction Demonstration
Someone else speaking to me
Me speaking
Research
I’m looking at examples of simple motorized curtains with Arduino as well as professional home curtain systems. I want my track to be circular so I will probably have to use a belt on a curved track. The fabric will be attached to parts of the belt.
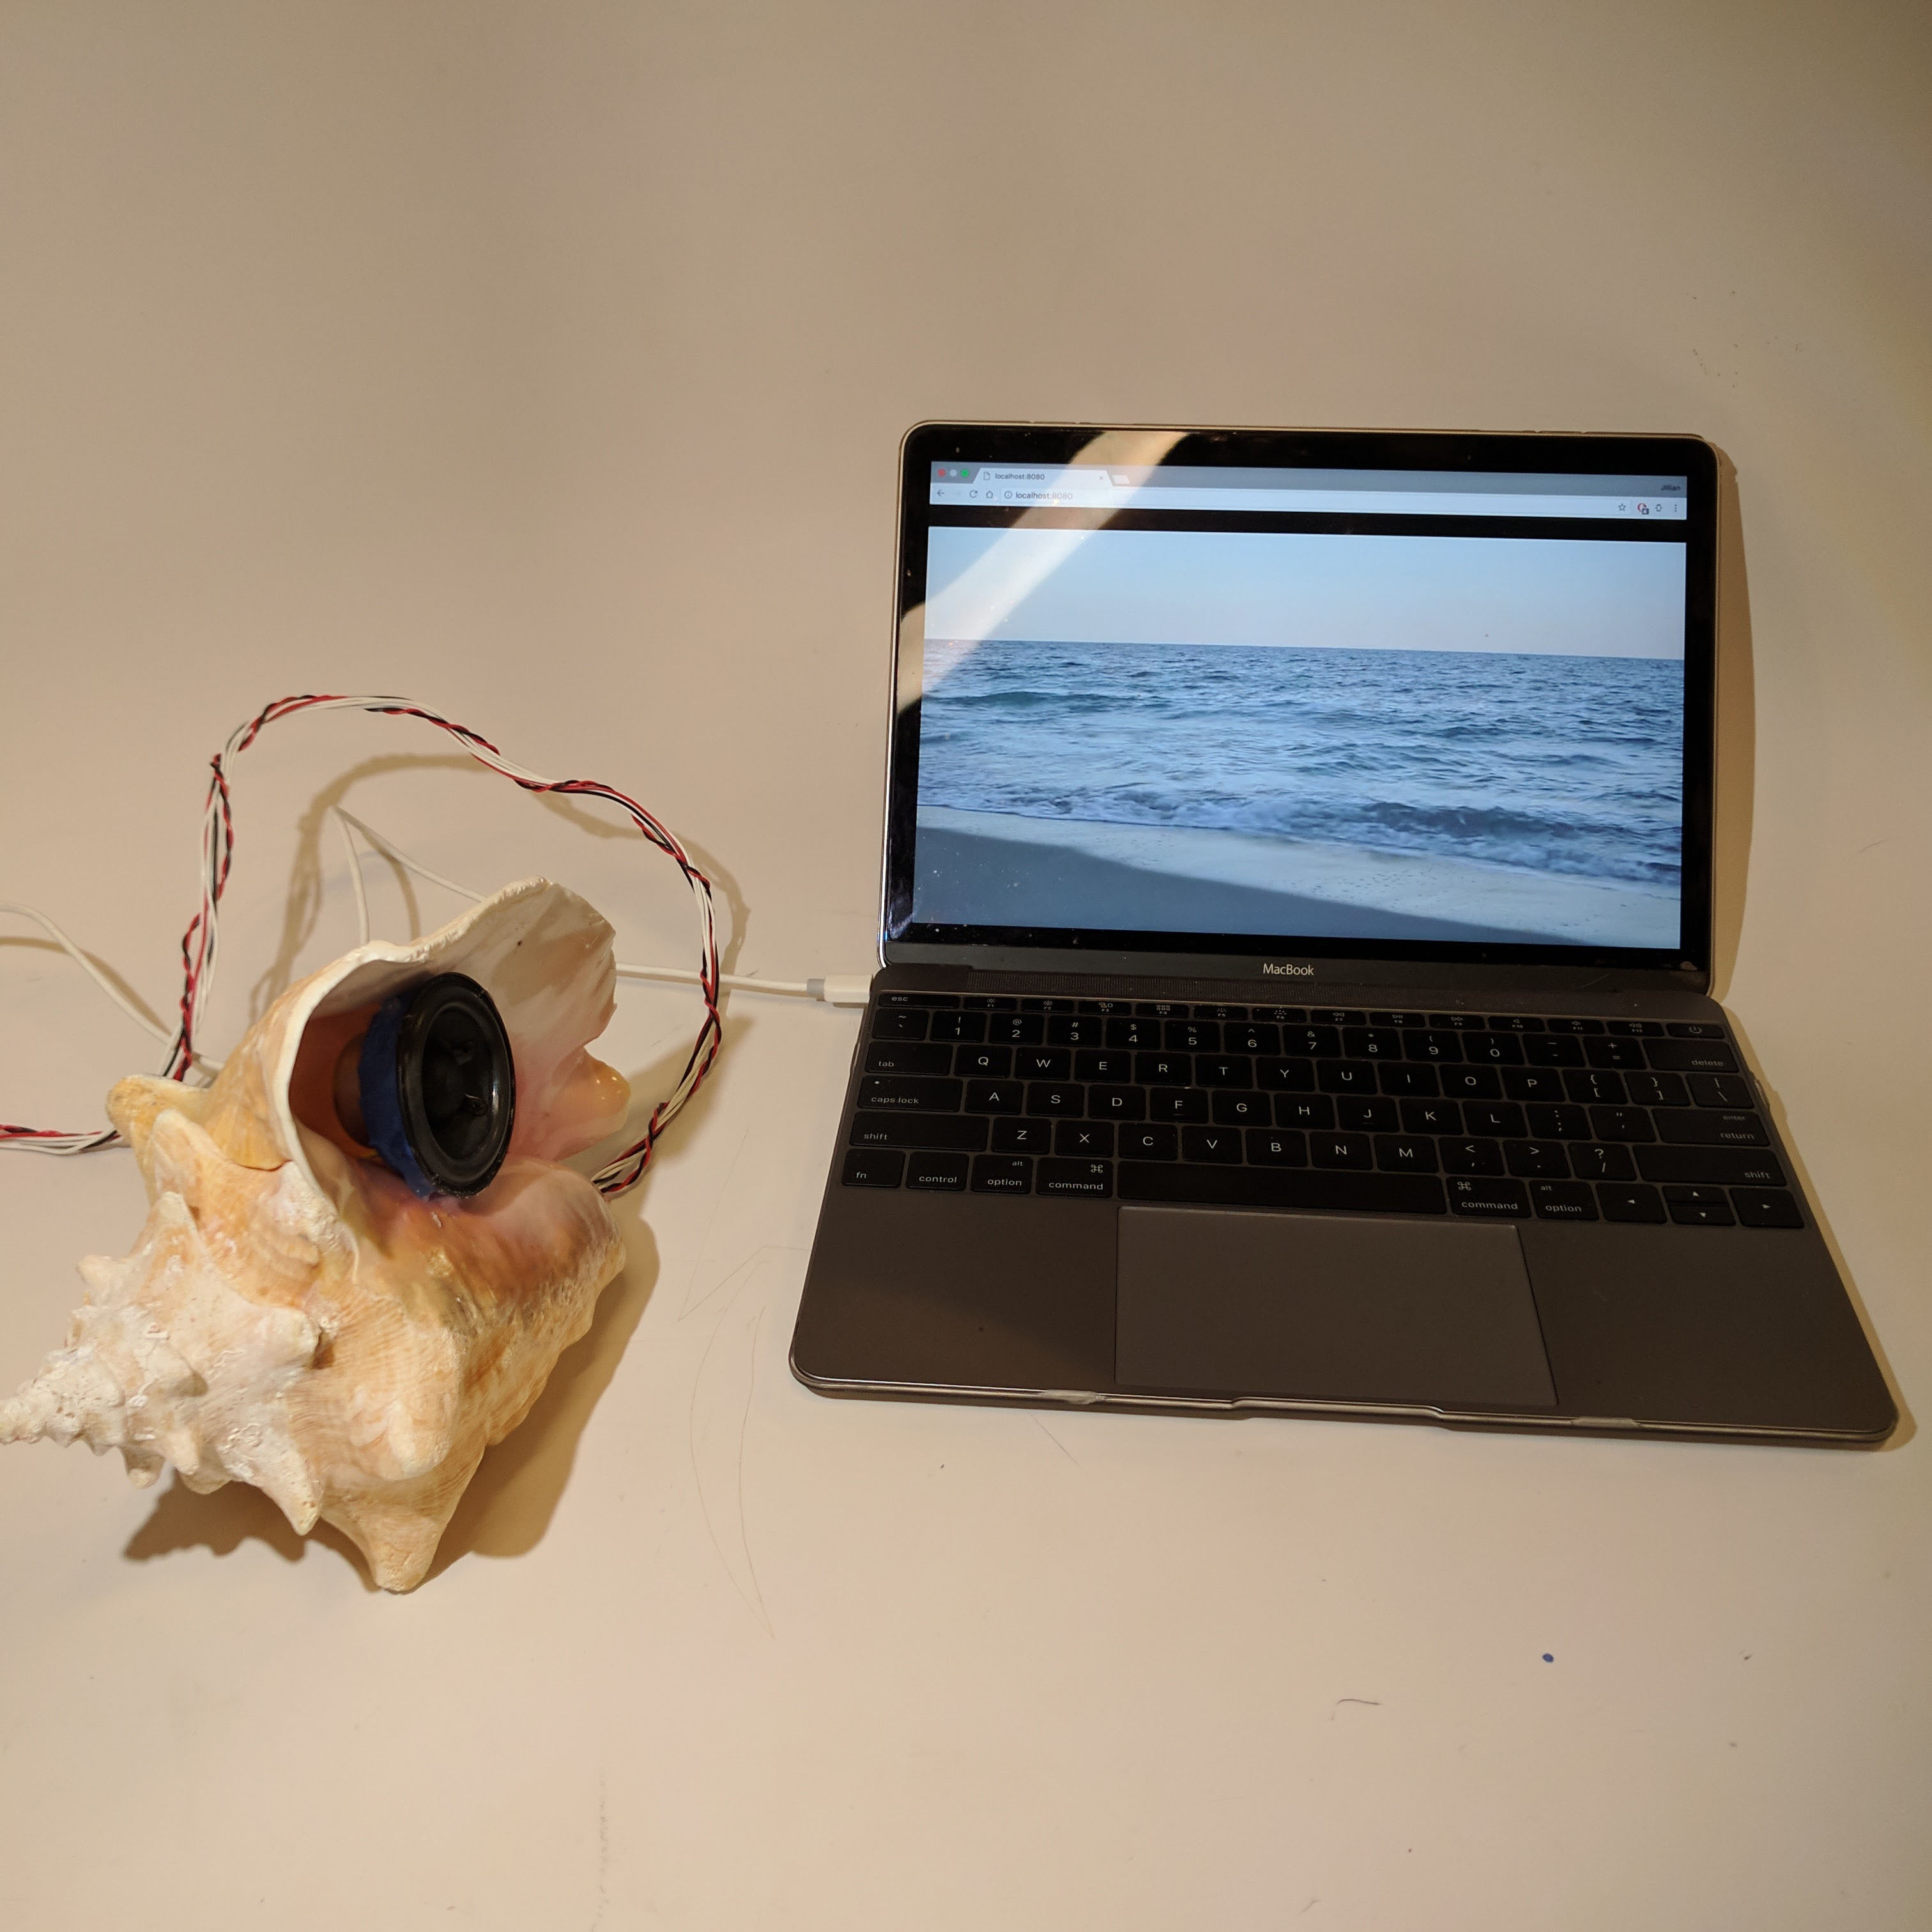
The concept was to hear sounds from a shell only when it’s at your ear. A large projection of a visualization would appear when the shell is picked up but the accompanying sound can only be heard if you have the shell to your ear.
I wanted to explore private spaces vs. public spaces and private individual experiences within a collective experience.
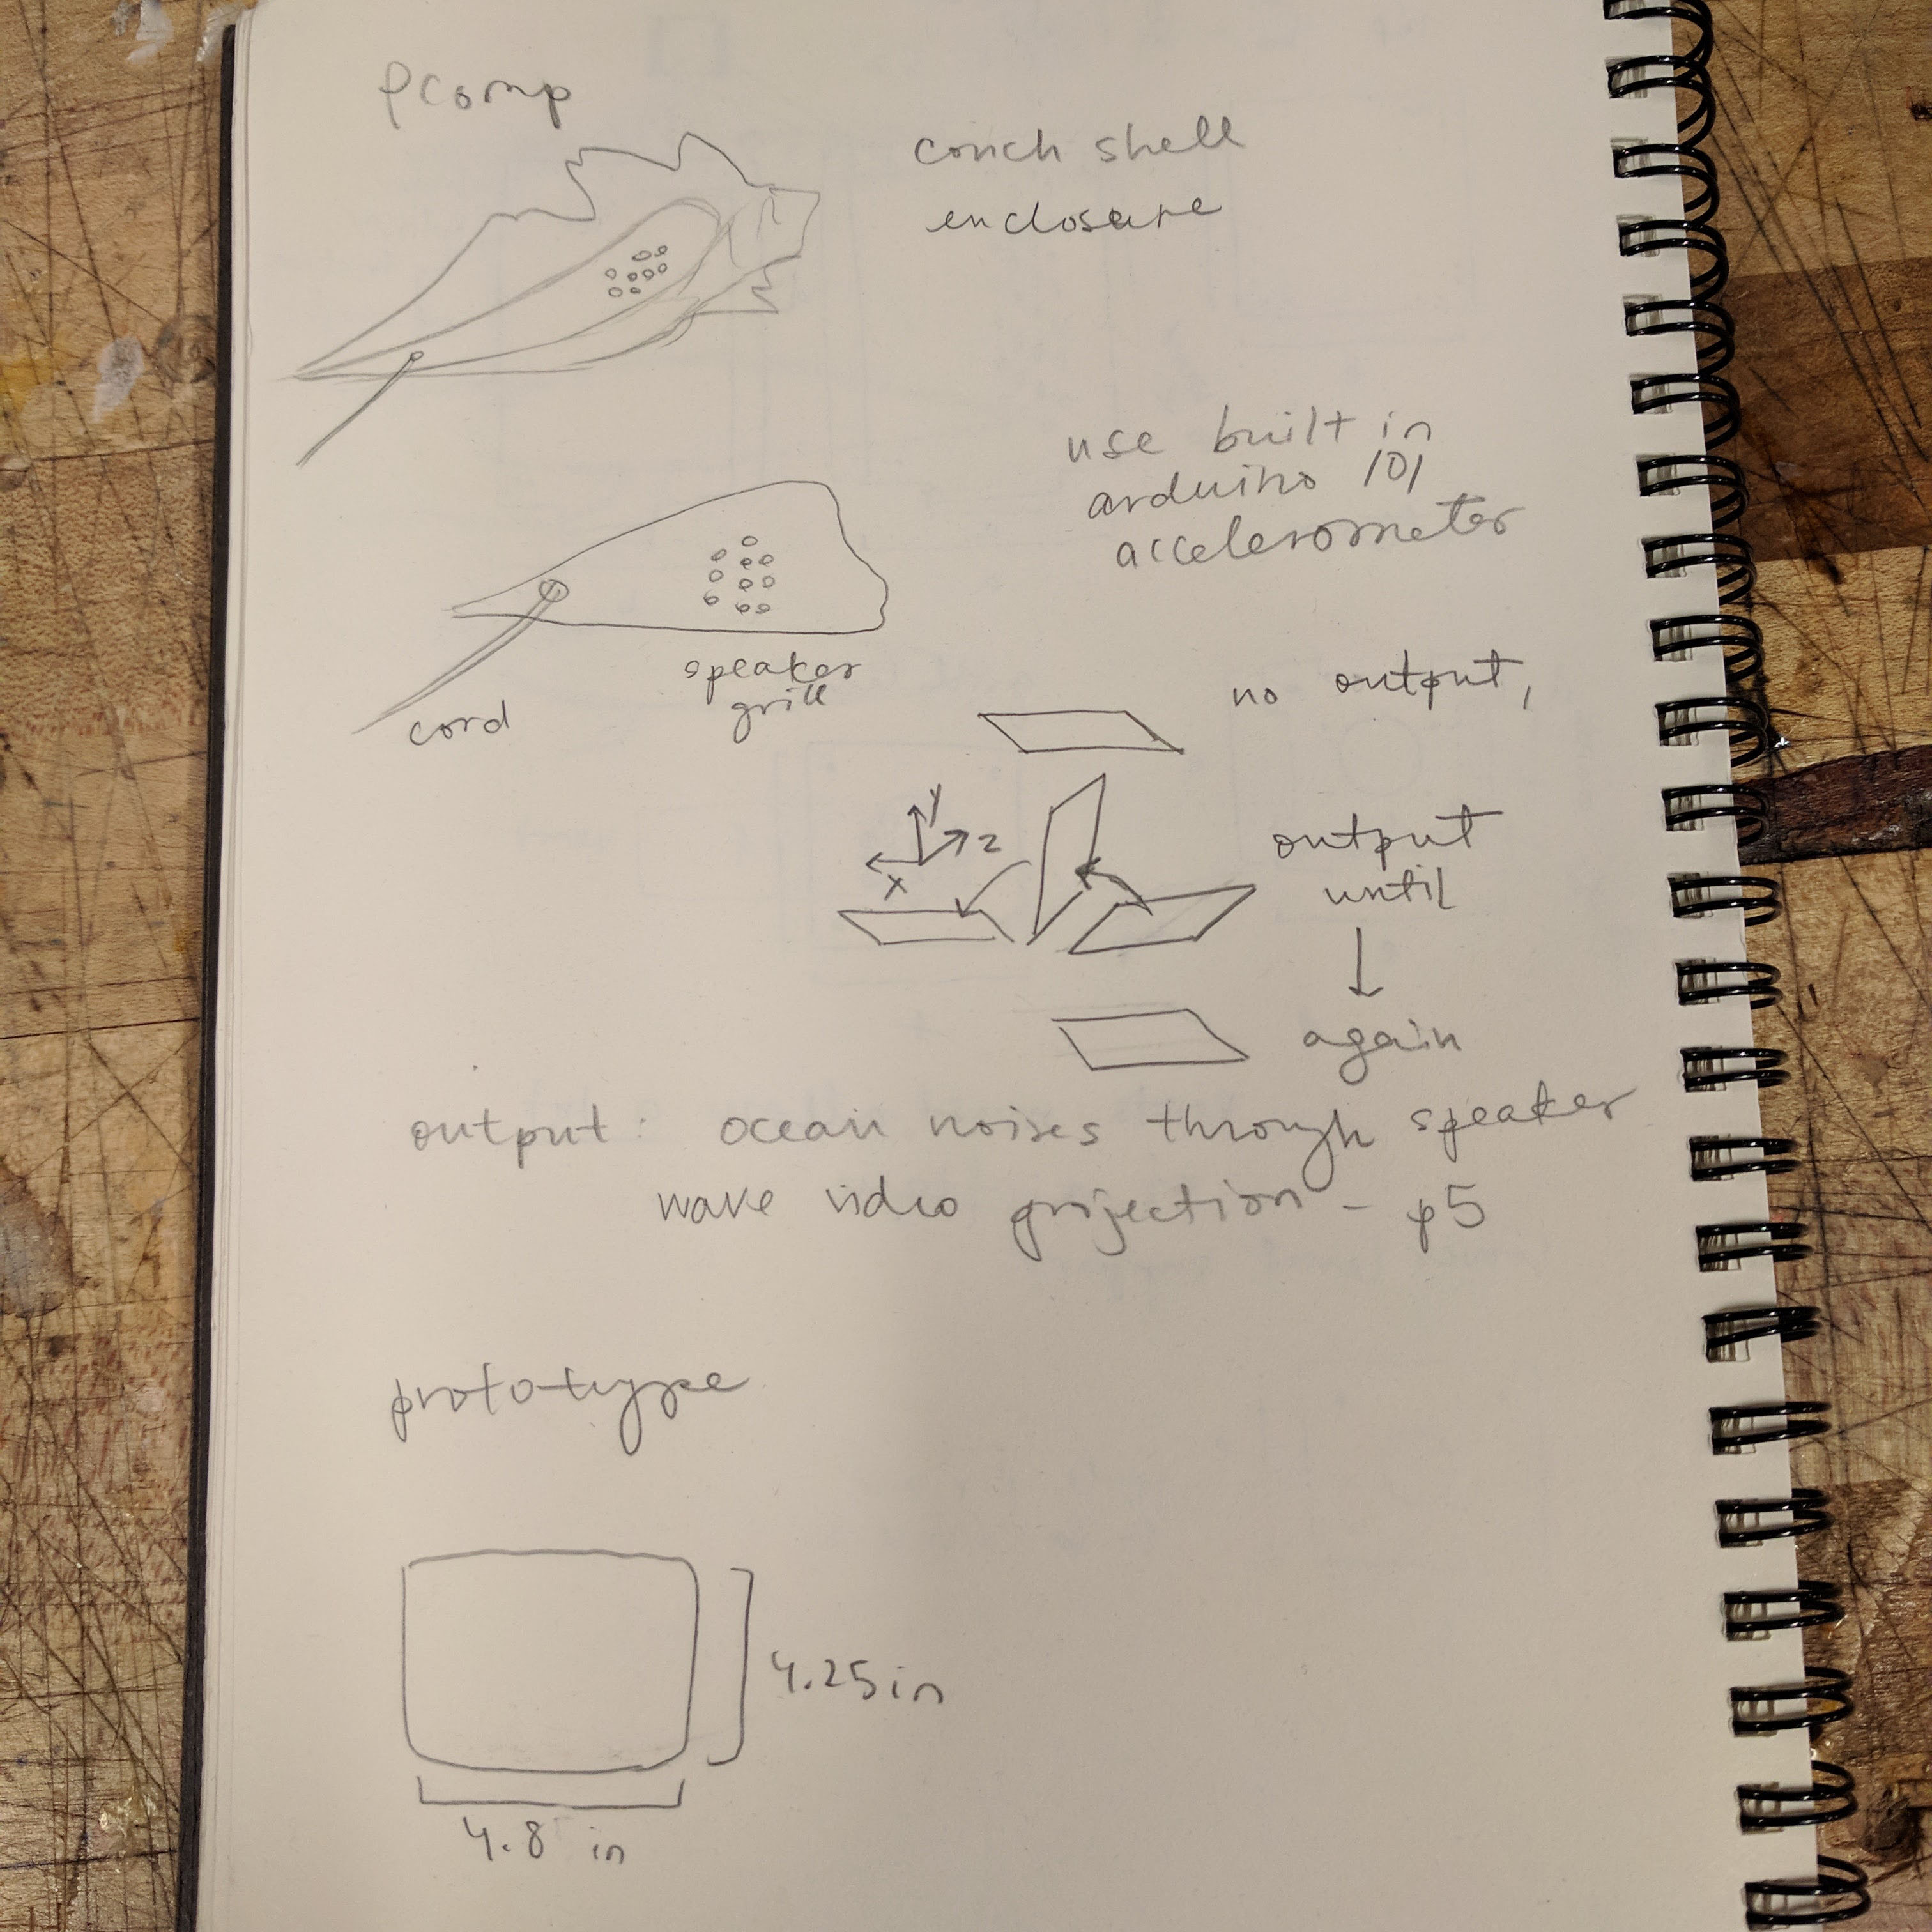
The shell enclosure was integral to the concept from the beginning. I later developed ideas for the visualization and audio components.
Physical Interaction
I originally planned to use the accelerometer built into the Arduino 101 to detect if the shell was faced down or being held up. This is what I used to build the prototype. I used example code from Arduino to output the orientation of the board as integers. I then played a note using the Tone library if the orientation was not 0 (board is flat faced up).
I ran into problems when trying to incorporate audio. I was originally thinking I could play .wav files using a SD card breakout board but the TMRpcm library is not compatible with the Arduino 101. I then purchased the Adafruit VS1053 MP3/AAC/Ogg/MIDI/WAV Codec Breakout Board, but again the VS1053 library is not currently updated to work with the 101.
Instead of figuring out how to adapt the library (something I know nothing about), I decided to just switch to the Arduino Uno and redo the accelerometer code. I used a separate 3-axis accelerometer, the Adafruit ADXL335. I used a custom ADXL335 library to make it easier to convert raw values from the accelerometer. I found this accelerometer to be more sensitive and than the one in the 101.
This iteration of the code originally checked if the accelerometer position was close to 0 on all axes (shell is down on table) or not (shell is picked up) and output the orientation as an integer 0 or 1 respectively. I later slightly adjusted the values to look for when I installed it into the enclosure. The final iteration saves the initial axes position of the accelerometer and checks for change from those values.
// this is in setup function// get initial accelerometer positioninitx=acc.getGX();inity=acc.getGY();initz=acc.getGZ();
// this is in loop function// read accelerometer:floatx=acc.getGX();floaty=acc.getGY();floatz=acc.getGZ();// board facing upif(abs(x-initx)<=0.35&&abs(y-inity)<=0.35&&abs(z-initz)<=0.35&&x<0&&y<0&&z<0){orientation=0;}// board not facing upelse{orientation=1;}
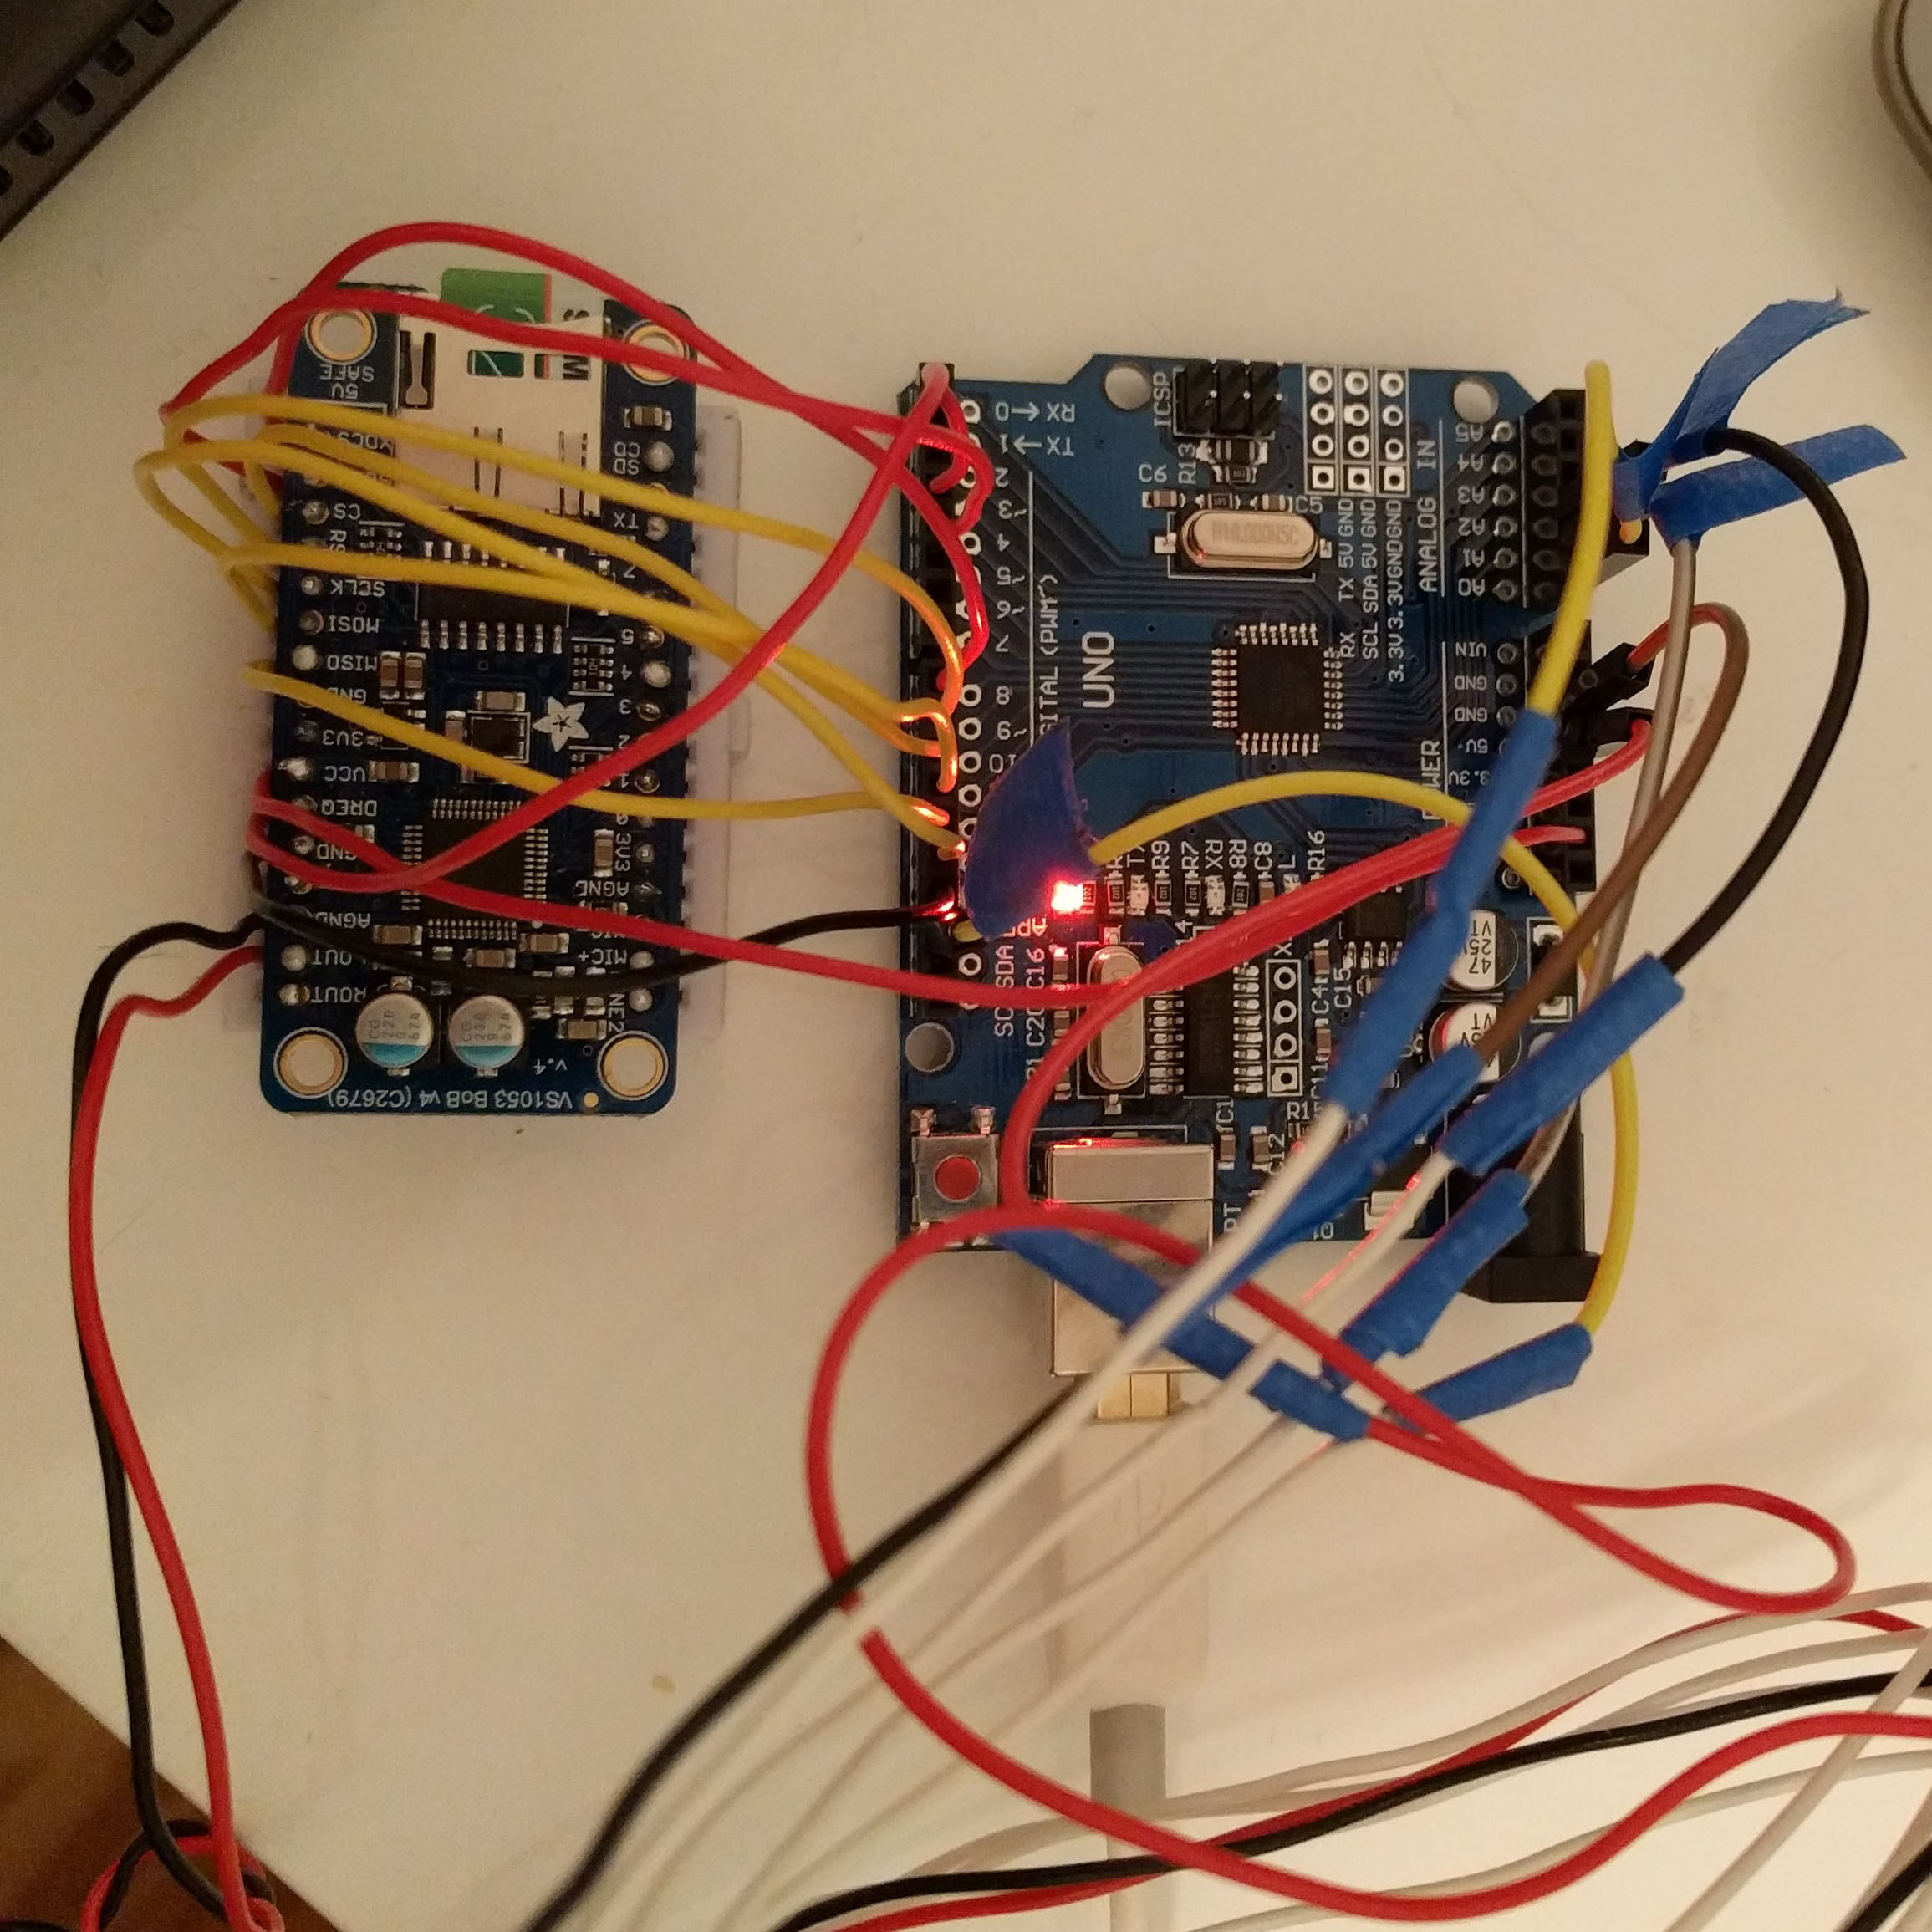
I followed Adafruit’s wiring guide except I connected a speaker to the left output pin LOUT and ground AGND instead of a headphone jack using both channels. My audio files are mono so this works out. The below photo has both sound breakout board and accelerometer connected to the Uno.
I wanted each time a user picked up the shell to be its own experience. In this way, I planned to make the track reveal something if the user listened long enough. My code reflects that. Everytime the user picks up the shell, it plays one track (alternating between 2 tracks, however I could add more). While the user has the shell picked up, the track that’s playing will loop until it’s put down. And of course, I do not play music if the shell is not picked up. I am using Adafruit VS1053 library’s FilePlayer class in the code below, which I adapted from the included examples:
// if not up orientation, play musicif(orientation!=0&&orientation!=-1){// alternate tracks when user just picks up shellif(lastOrientation!=orientation){if(justPlayedTrackOne==true){musicPlayer.startPlayingFile("track002.mp3");justPlayedTrackOne=false;}else{musicPlayer.startPlayingFile("track001.mp3");justPlayedTrackOne=true;}}// loop track if shell is still not in up orientation when track finishes (user is still listening)else{if(musicPlayer.stopped()&&justPlayedTrackOne==true){musicPlayer.startPlayingFile("track001.mp3");}elseif(musicPlayer.stopped()&&justPlayedTrackOne==false){musicPlayer.startPlayingFile("track002.mp3");}}}else{musicPlayer.stopPlaying();//stop player}
The audio files were created using Adobe Audition and exported as wav files and then converted to mp3 to work with the tutorial. I had trouble getting my program to recognize the files in the SD card unless they were named ‘track001.mp3’ or ‘track002.mp3’ but the library documentation suggests that the names can be anything as long as it’s reflected in your code.
I used wave sounds from the visualization video to bookend a song in each track. The songs used were d e c i s i v e d r e a m s by HAUNTXR and Shi no Aphrodite: Tsuioku.
Mixed tracks used in piece:
Screen Visualization
The visualization receives data from the Uno from the p5serial.js library. The p5 sketch receives the orientation (0 or 1) from the Arduino code and hides and unhides the div the video player is in. I am manipulating the DOM using the p5.dom library.
if(orientation==0&&lastOrientation!=0){oceanVideo.hide();}// isnt up was upelseif(orientation!=0&&lastOrientation==0){oceanVideo.show();}lastOrientation=orientation;
The video player is simply a YouTube player created using YouTube’s IFrame Player API with these parameters passed in:
I used node to run a server locally. So, when running the piece, the p5 serial server must be running as well as node. To do this, type p5serial in terminal. Make sure the Arduino is sending information to serial. Open another tab and navigate to the folder the sketch is in and type node server.js. Open a browser page and go to the local server address and the visualization should be running along with the physical components.
Enclosure
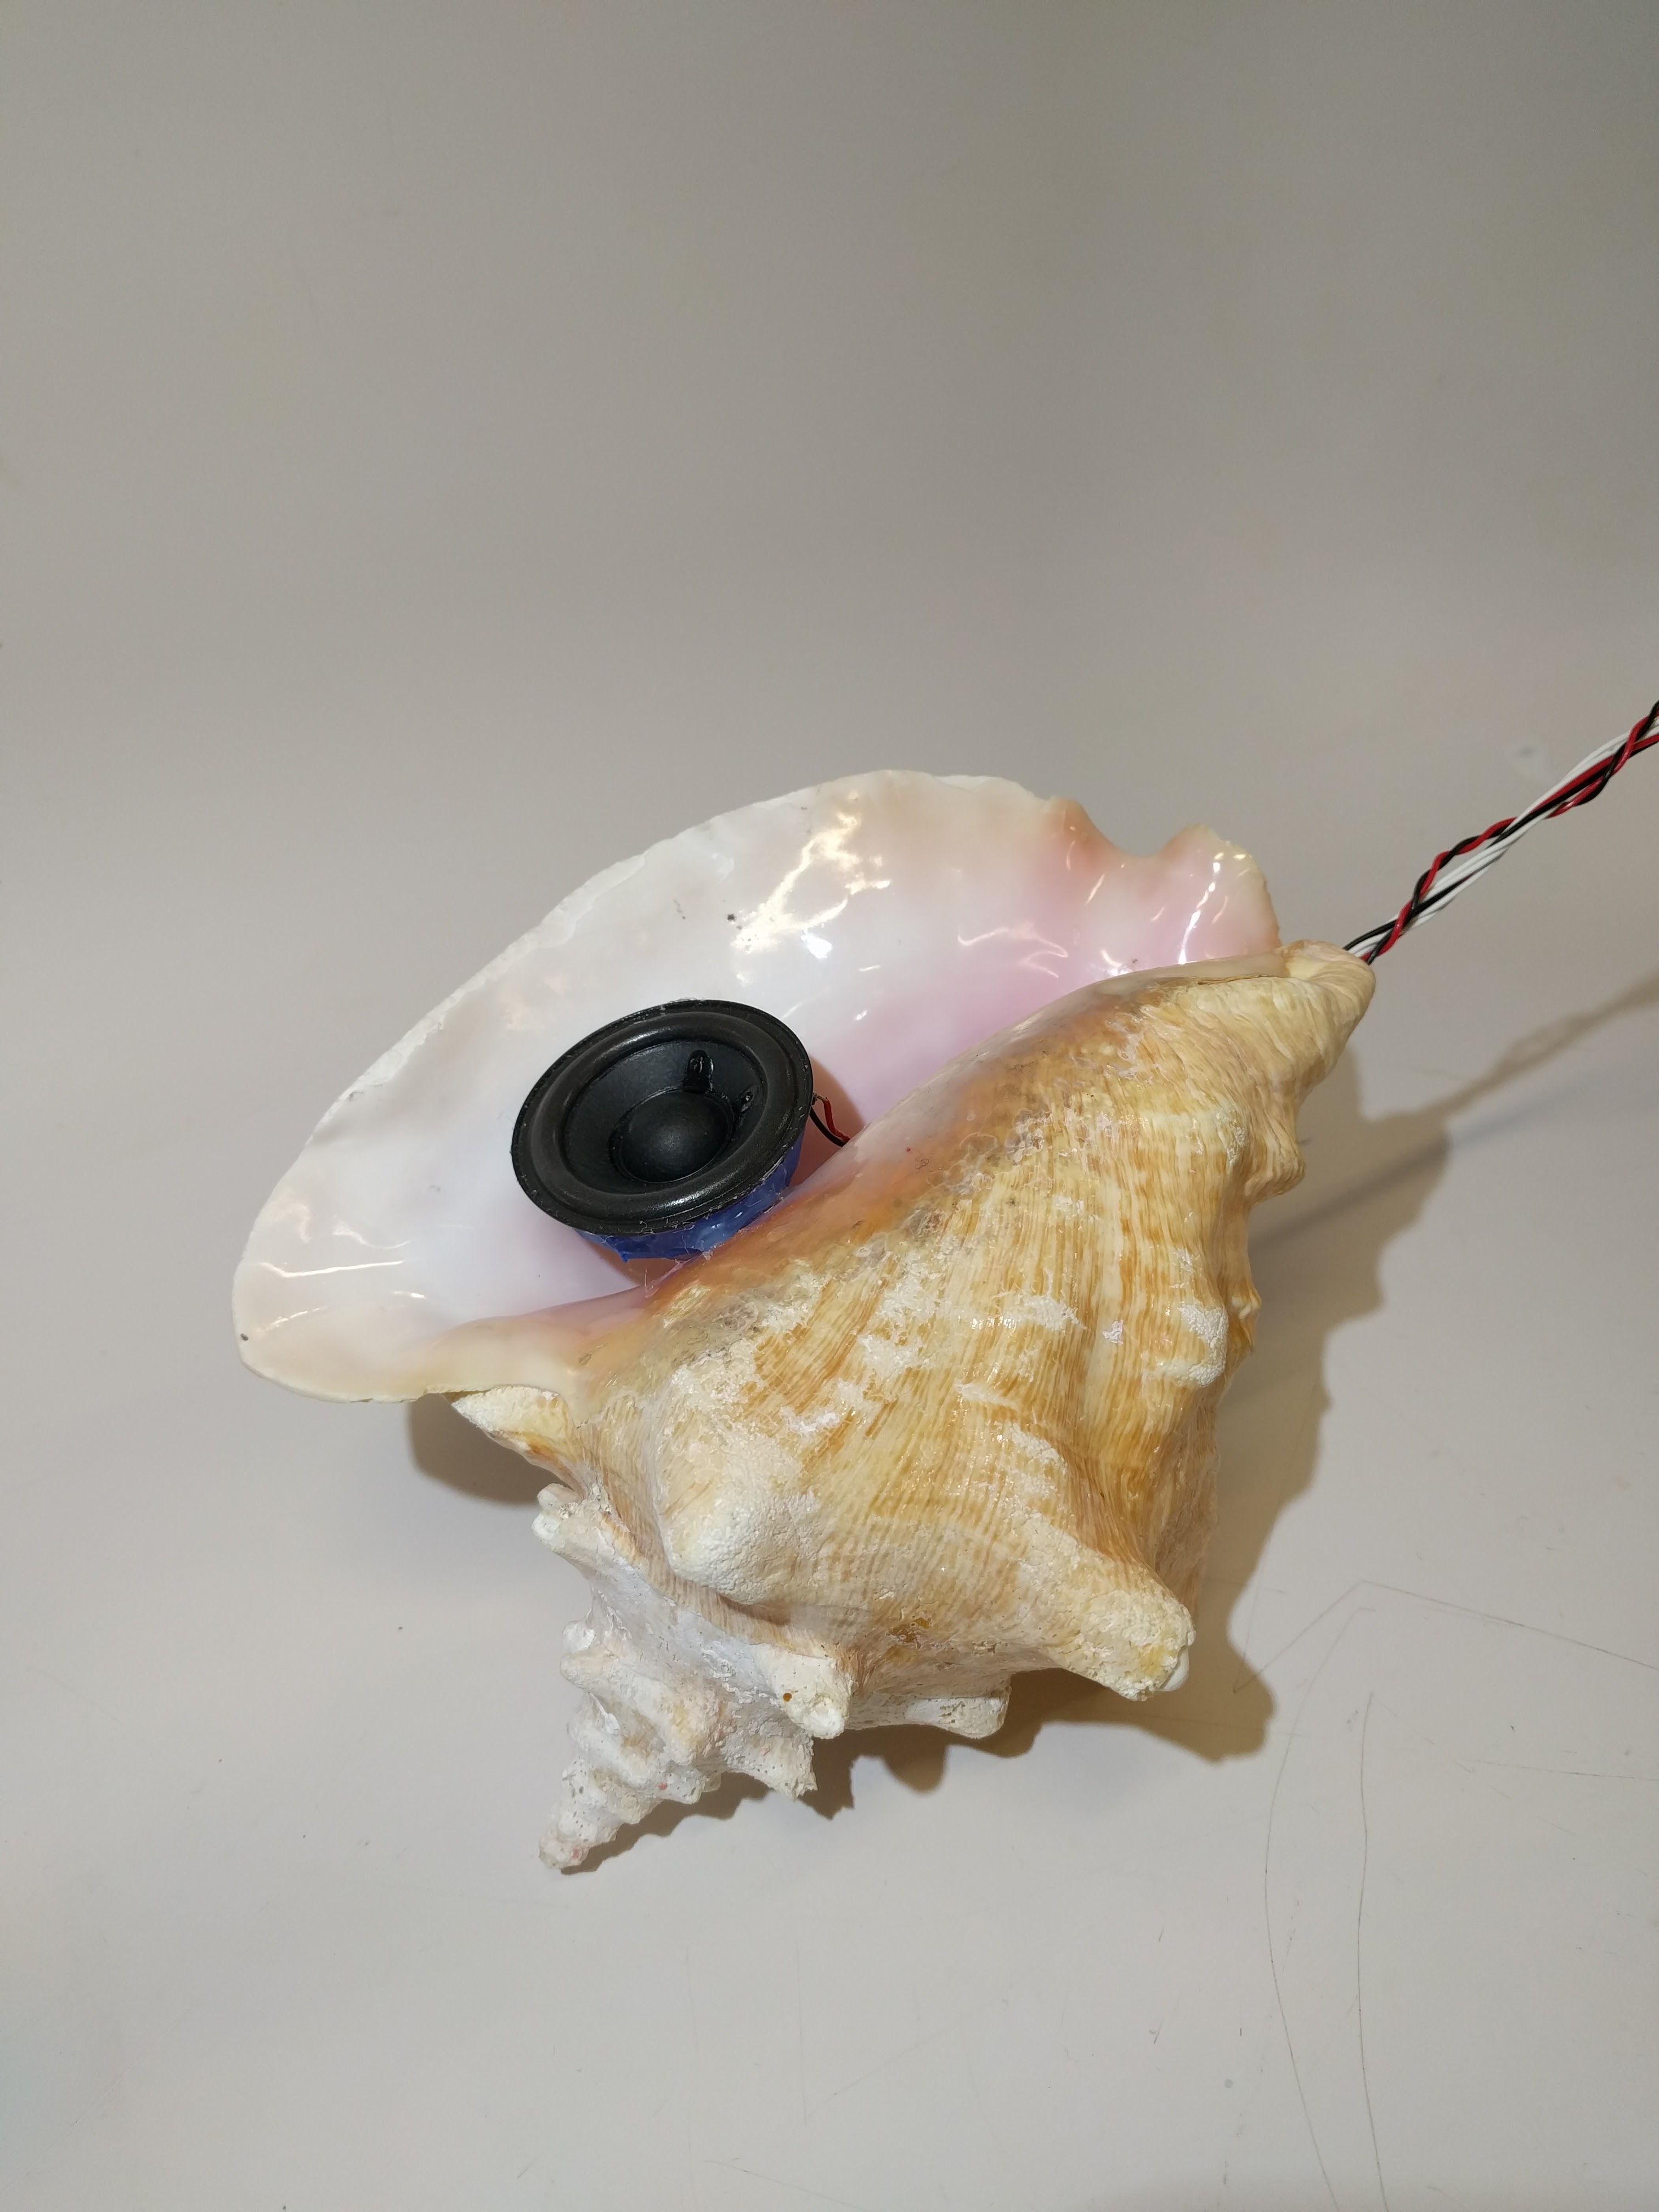
The shell enclosure is the central point of the piece. In my prototype, the 101 board was housed in the shell enclosure since it contained the accelerometer. After switching to a separate accelerometer, I could reduce the amount of chips I had to fit inside the shell. The final iteration’s shell contains the accelerometer and the speaker. The accelerometer is taped face up to a strip of cardboard which is hotglued to the inside. It does not have to be perfectly parallel to the table surface since the code logic is based off of the initial position of the accelerometer. The speaker is also hot glued to the shell.
I had to solder longer wires to the speaker in order for the shell to be separate from the Uno and sound breakout boards. For the accelerometer connections, I needed to use male to female jumper wire connectors to connect from the Uno to the pins on the breakout accelerometer. I didn’t have jumper wires that were long enough so I cut the short ones I had in half, stripped them, and soldered a longer strand of wire inbetween. I then insulated these points with painters tape. I labeled the wires with tape so that I would know where to connect them on the Uno since they are so long as you can see here:
I twisted the speaker and accelerometer wires together and temporarily housed the Uno and sound breakout board in a sunglasses case. To improve upon this, I would create an actual enclosure for the Uno and sound breakout board with surface mount ports. I would use stranded wire for the accelerometer and speaker wires and have a white encasing similar to a telephone wire. I do like the contrast with the speaker sticking out of the natural shell; however, it would be interesting to experiment with a smaller one that could be hidden inside.
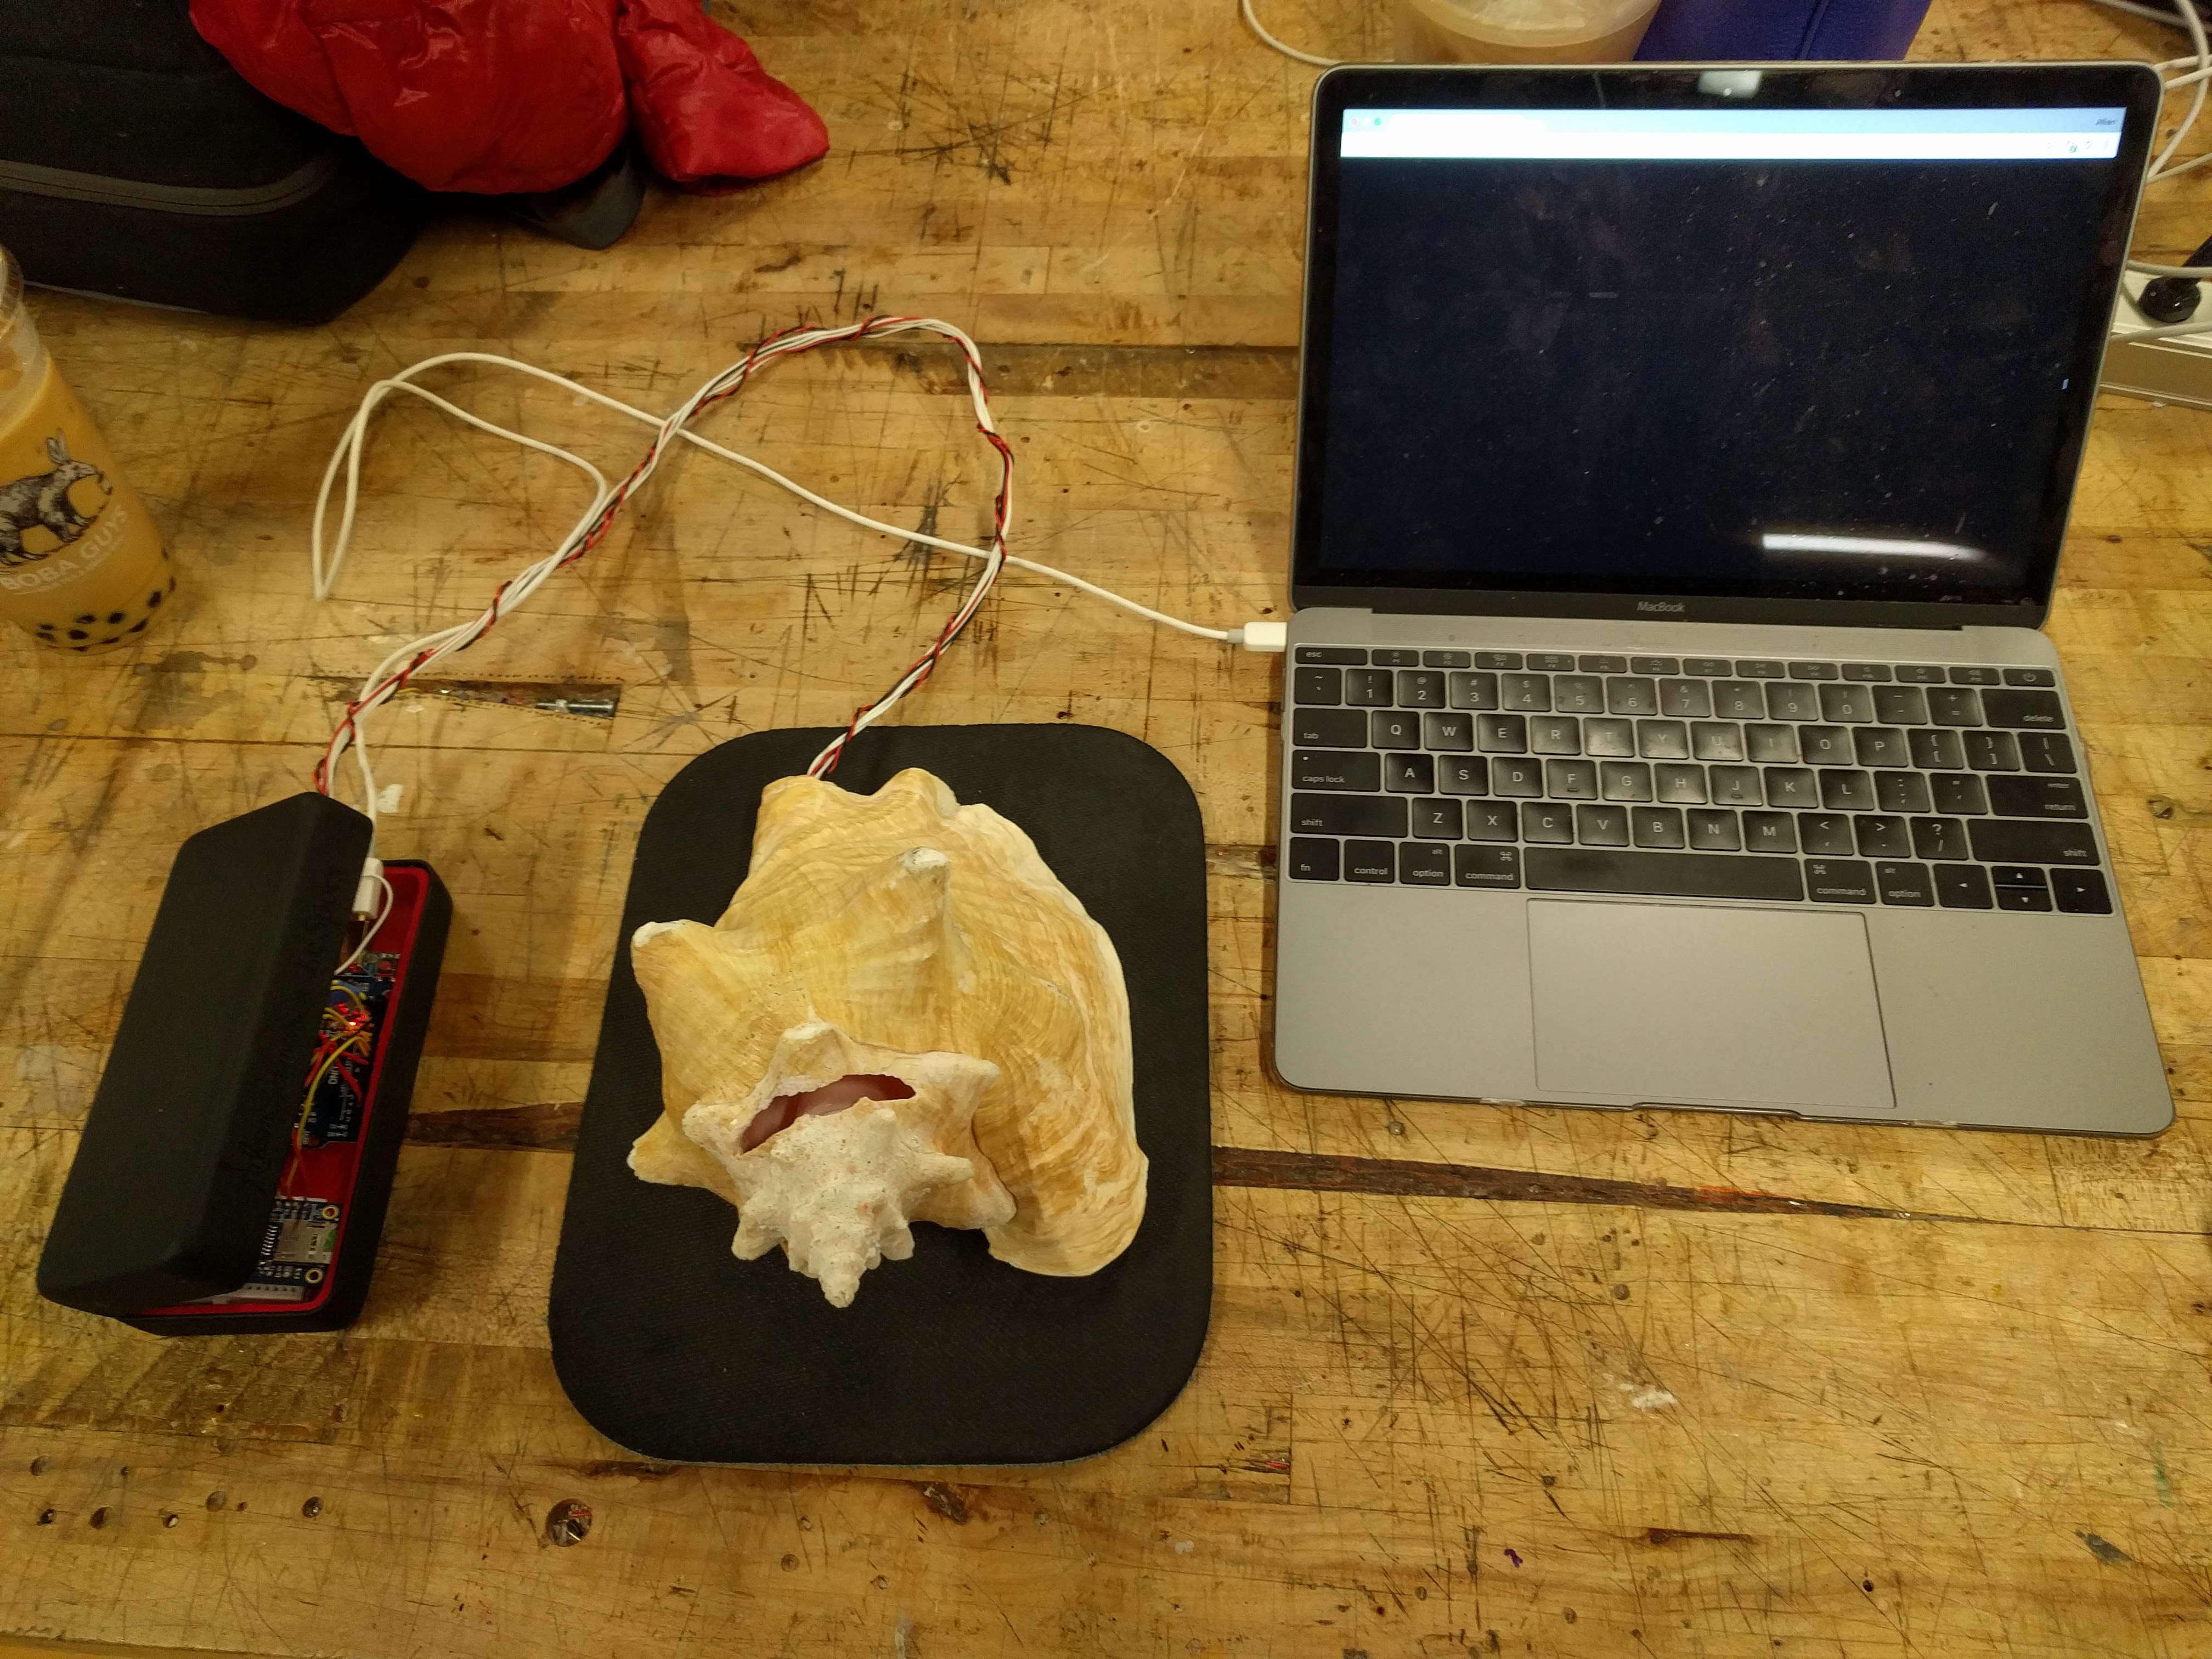
Set up consists of: Arduino Uno and sound breakout board within black case, speaker and accelerometer within shell connected to soundbreakout board and Uno respectively, and Uno connected to laptop running visualization.
I placed the shell on a mouse pad to cushion it when placing it down. The accelerometer value range for changing the orientation are not wide enough so it changes the orientation a couple times when the shell is being put down or picked up do to rocking against the hard table. The pad fixes this a little bit but further tuning would have to be done in the code.
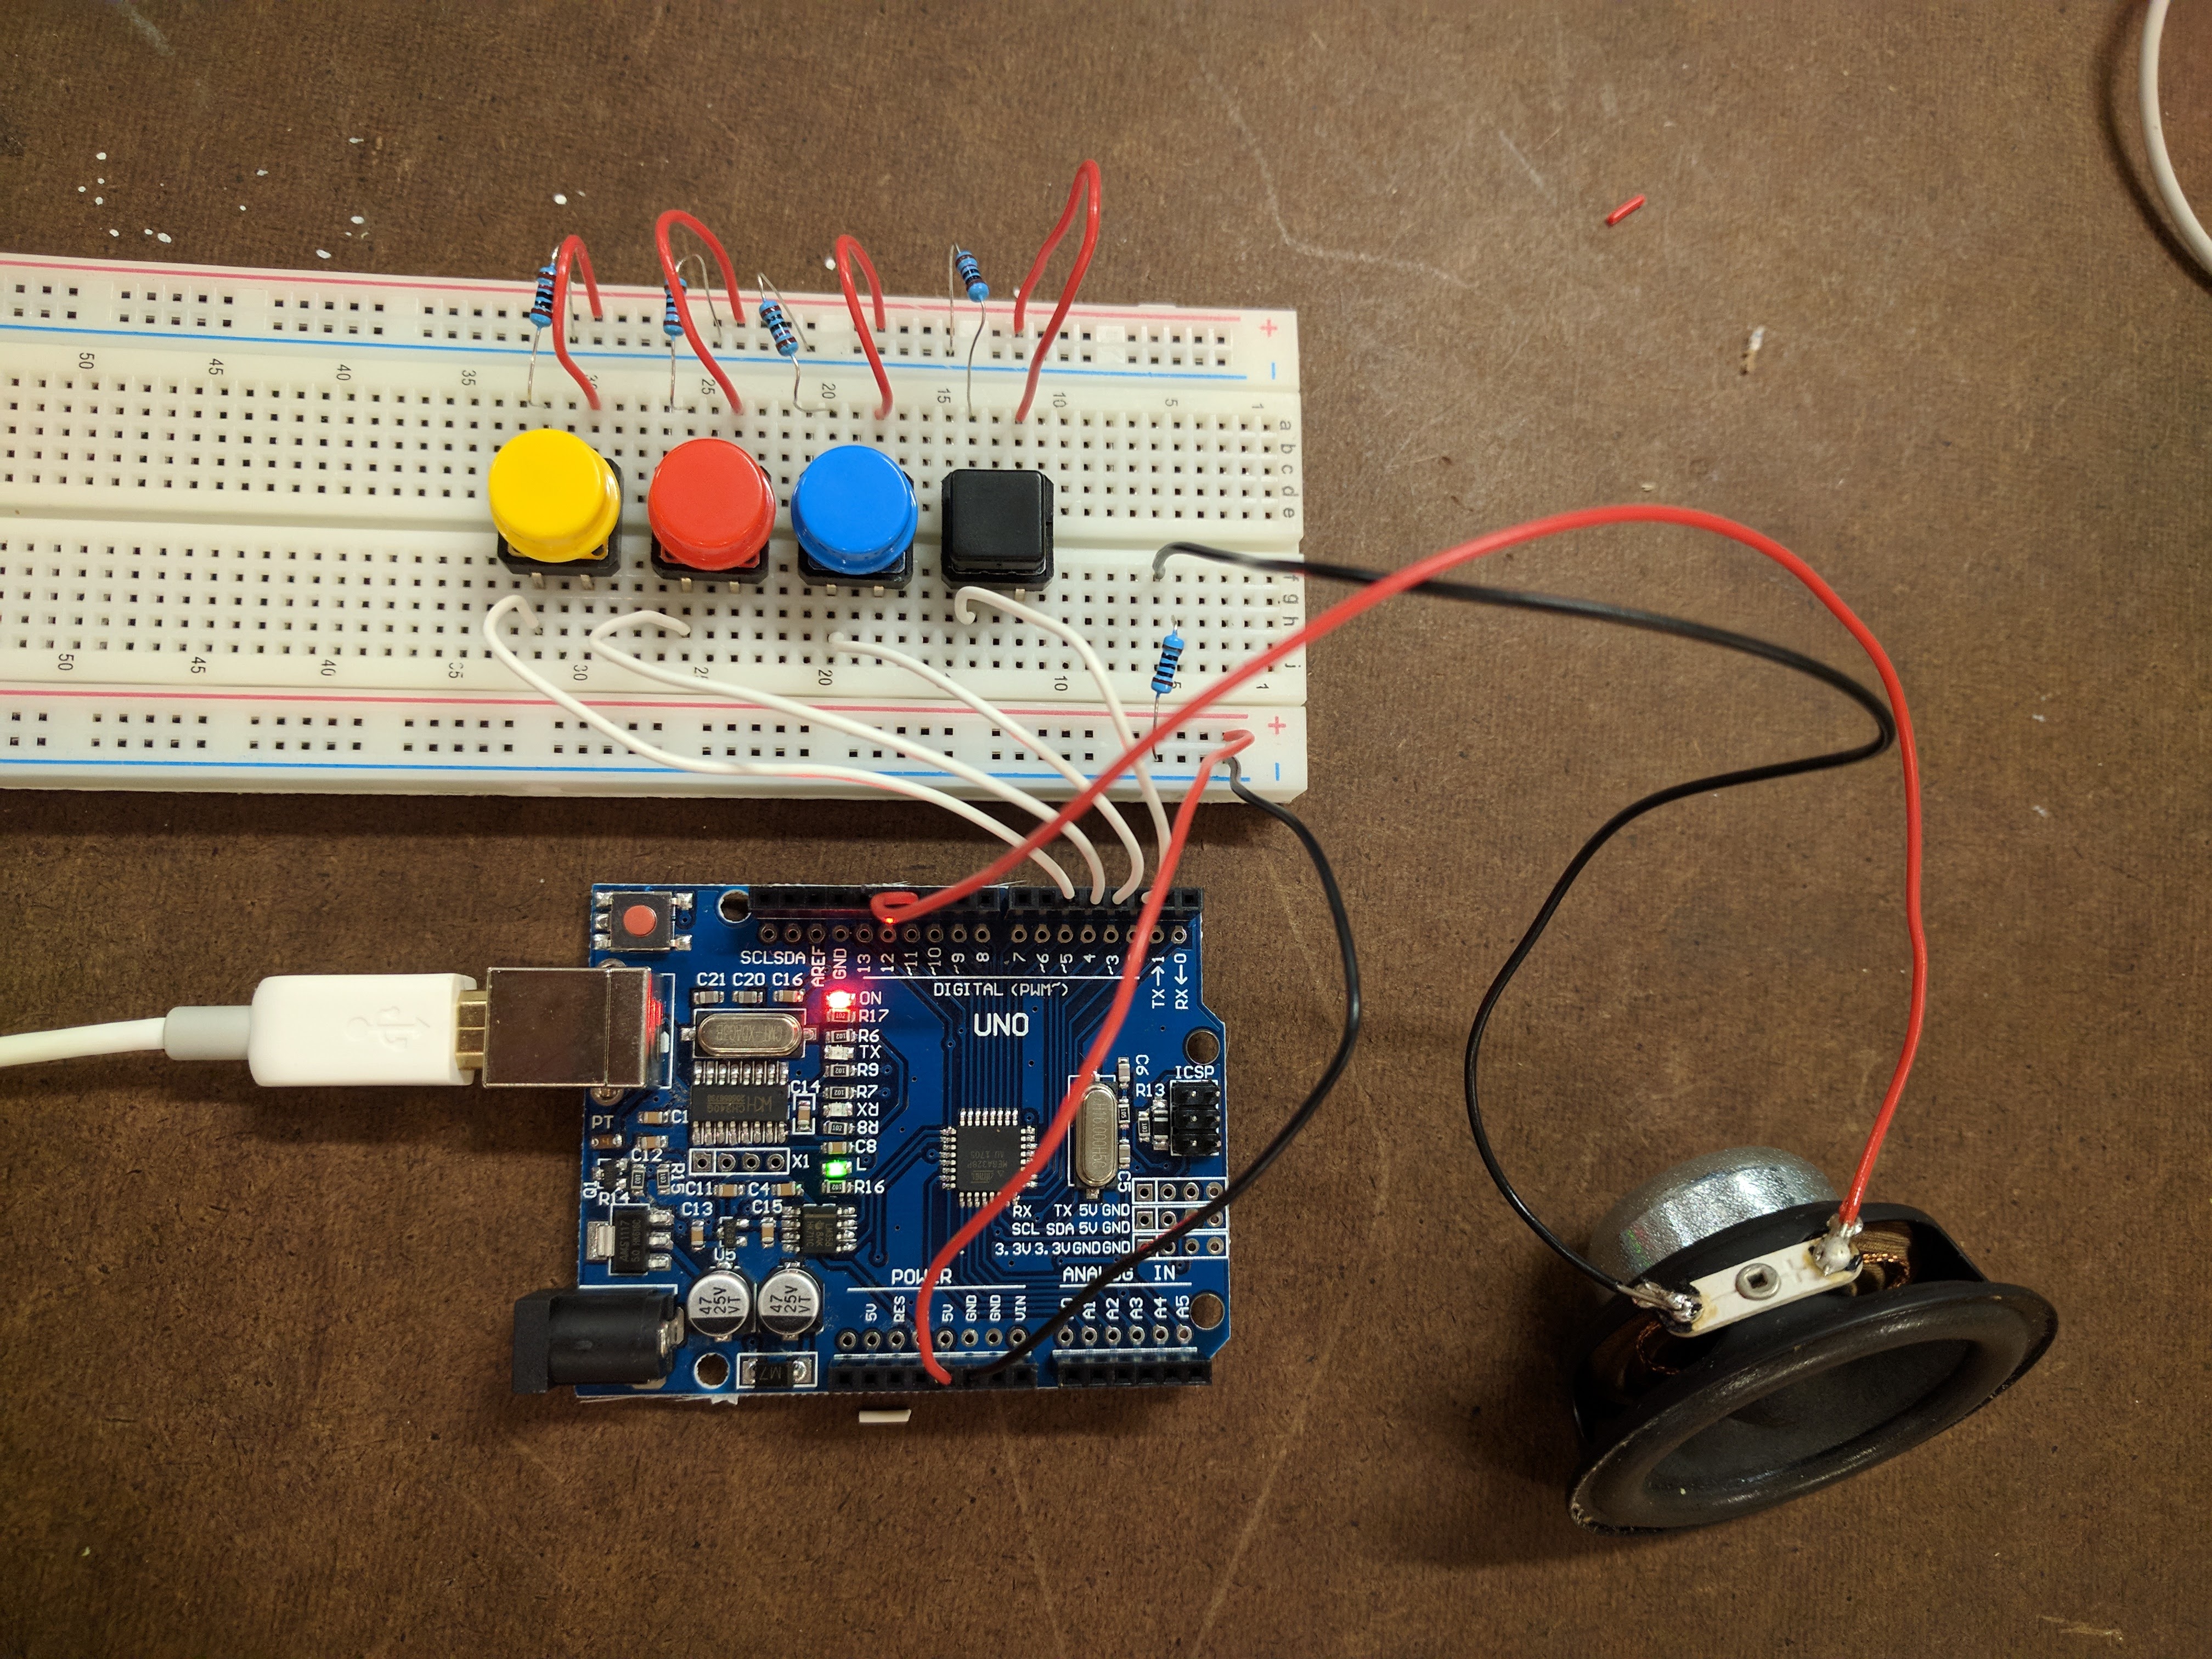
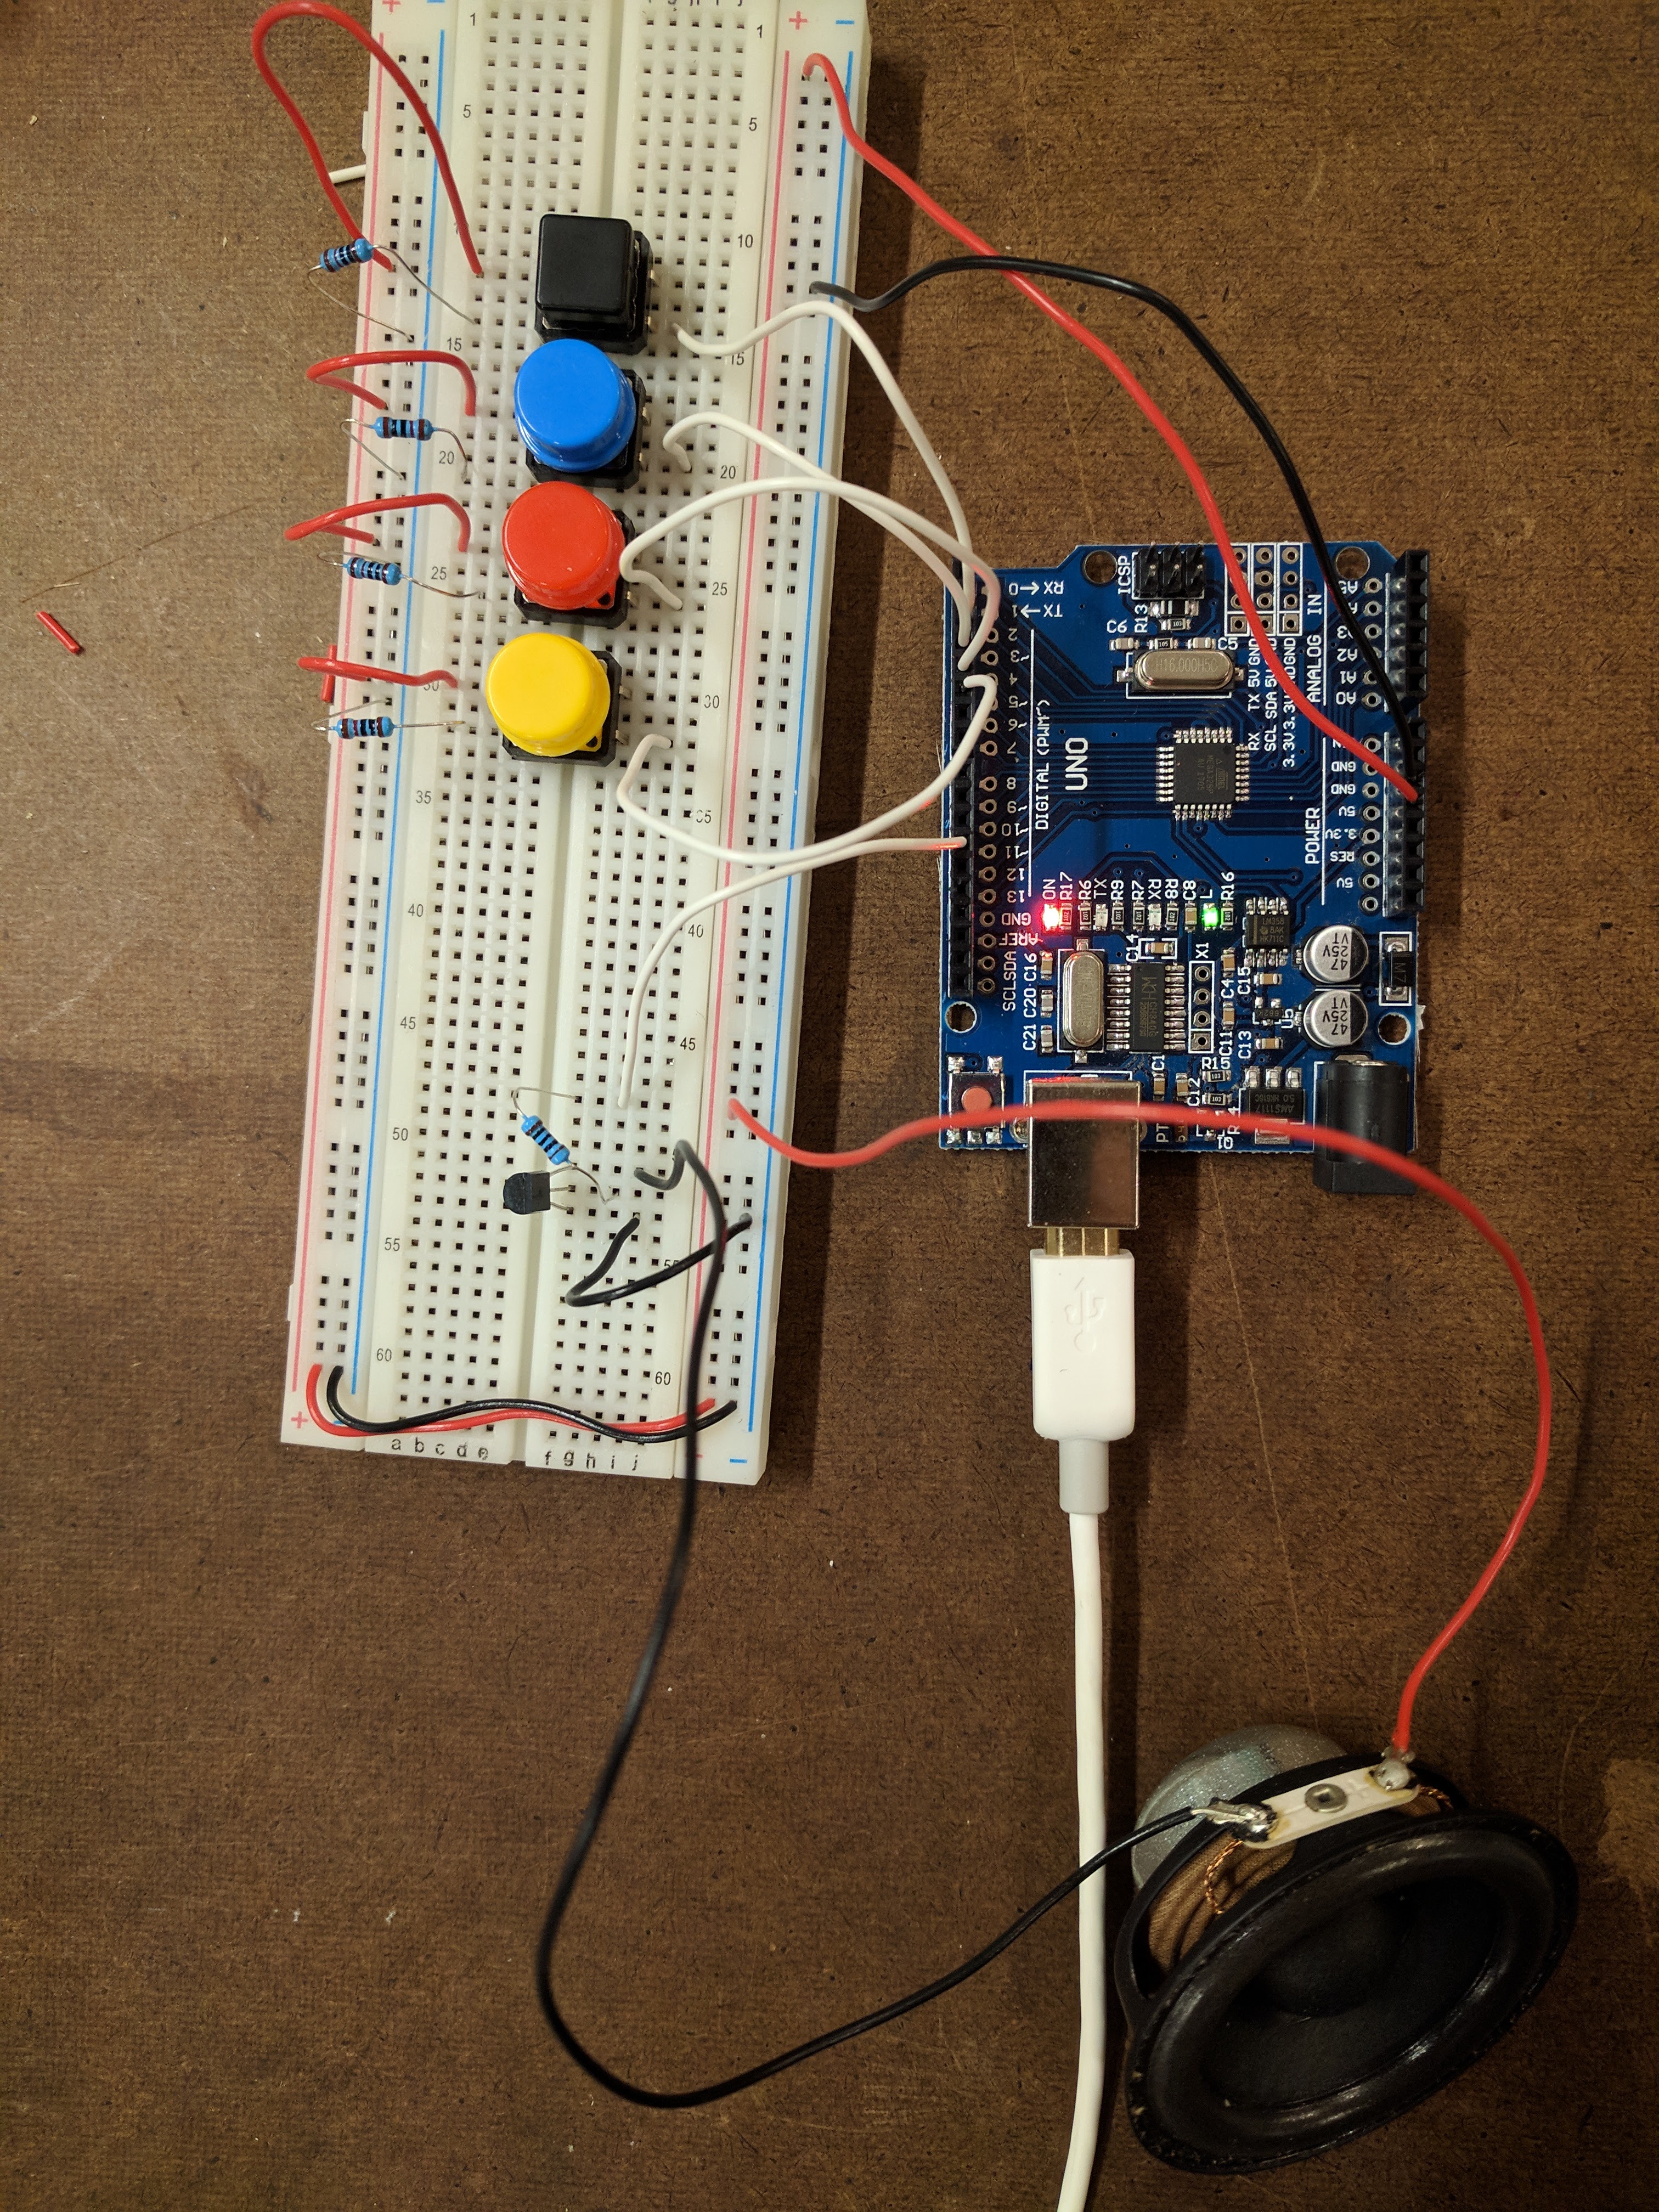
I made a sample based instrument using Arduino Uno and the PCM library.
I began by following the instructions on this tutorial and setting up the example. After this worked, I tried creating my own samples. I downloaded samples as wav files and followed the tutorial’s instructions on using iTunes to convert them to 8 KHz, 8-bit mono sound mp3 files.
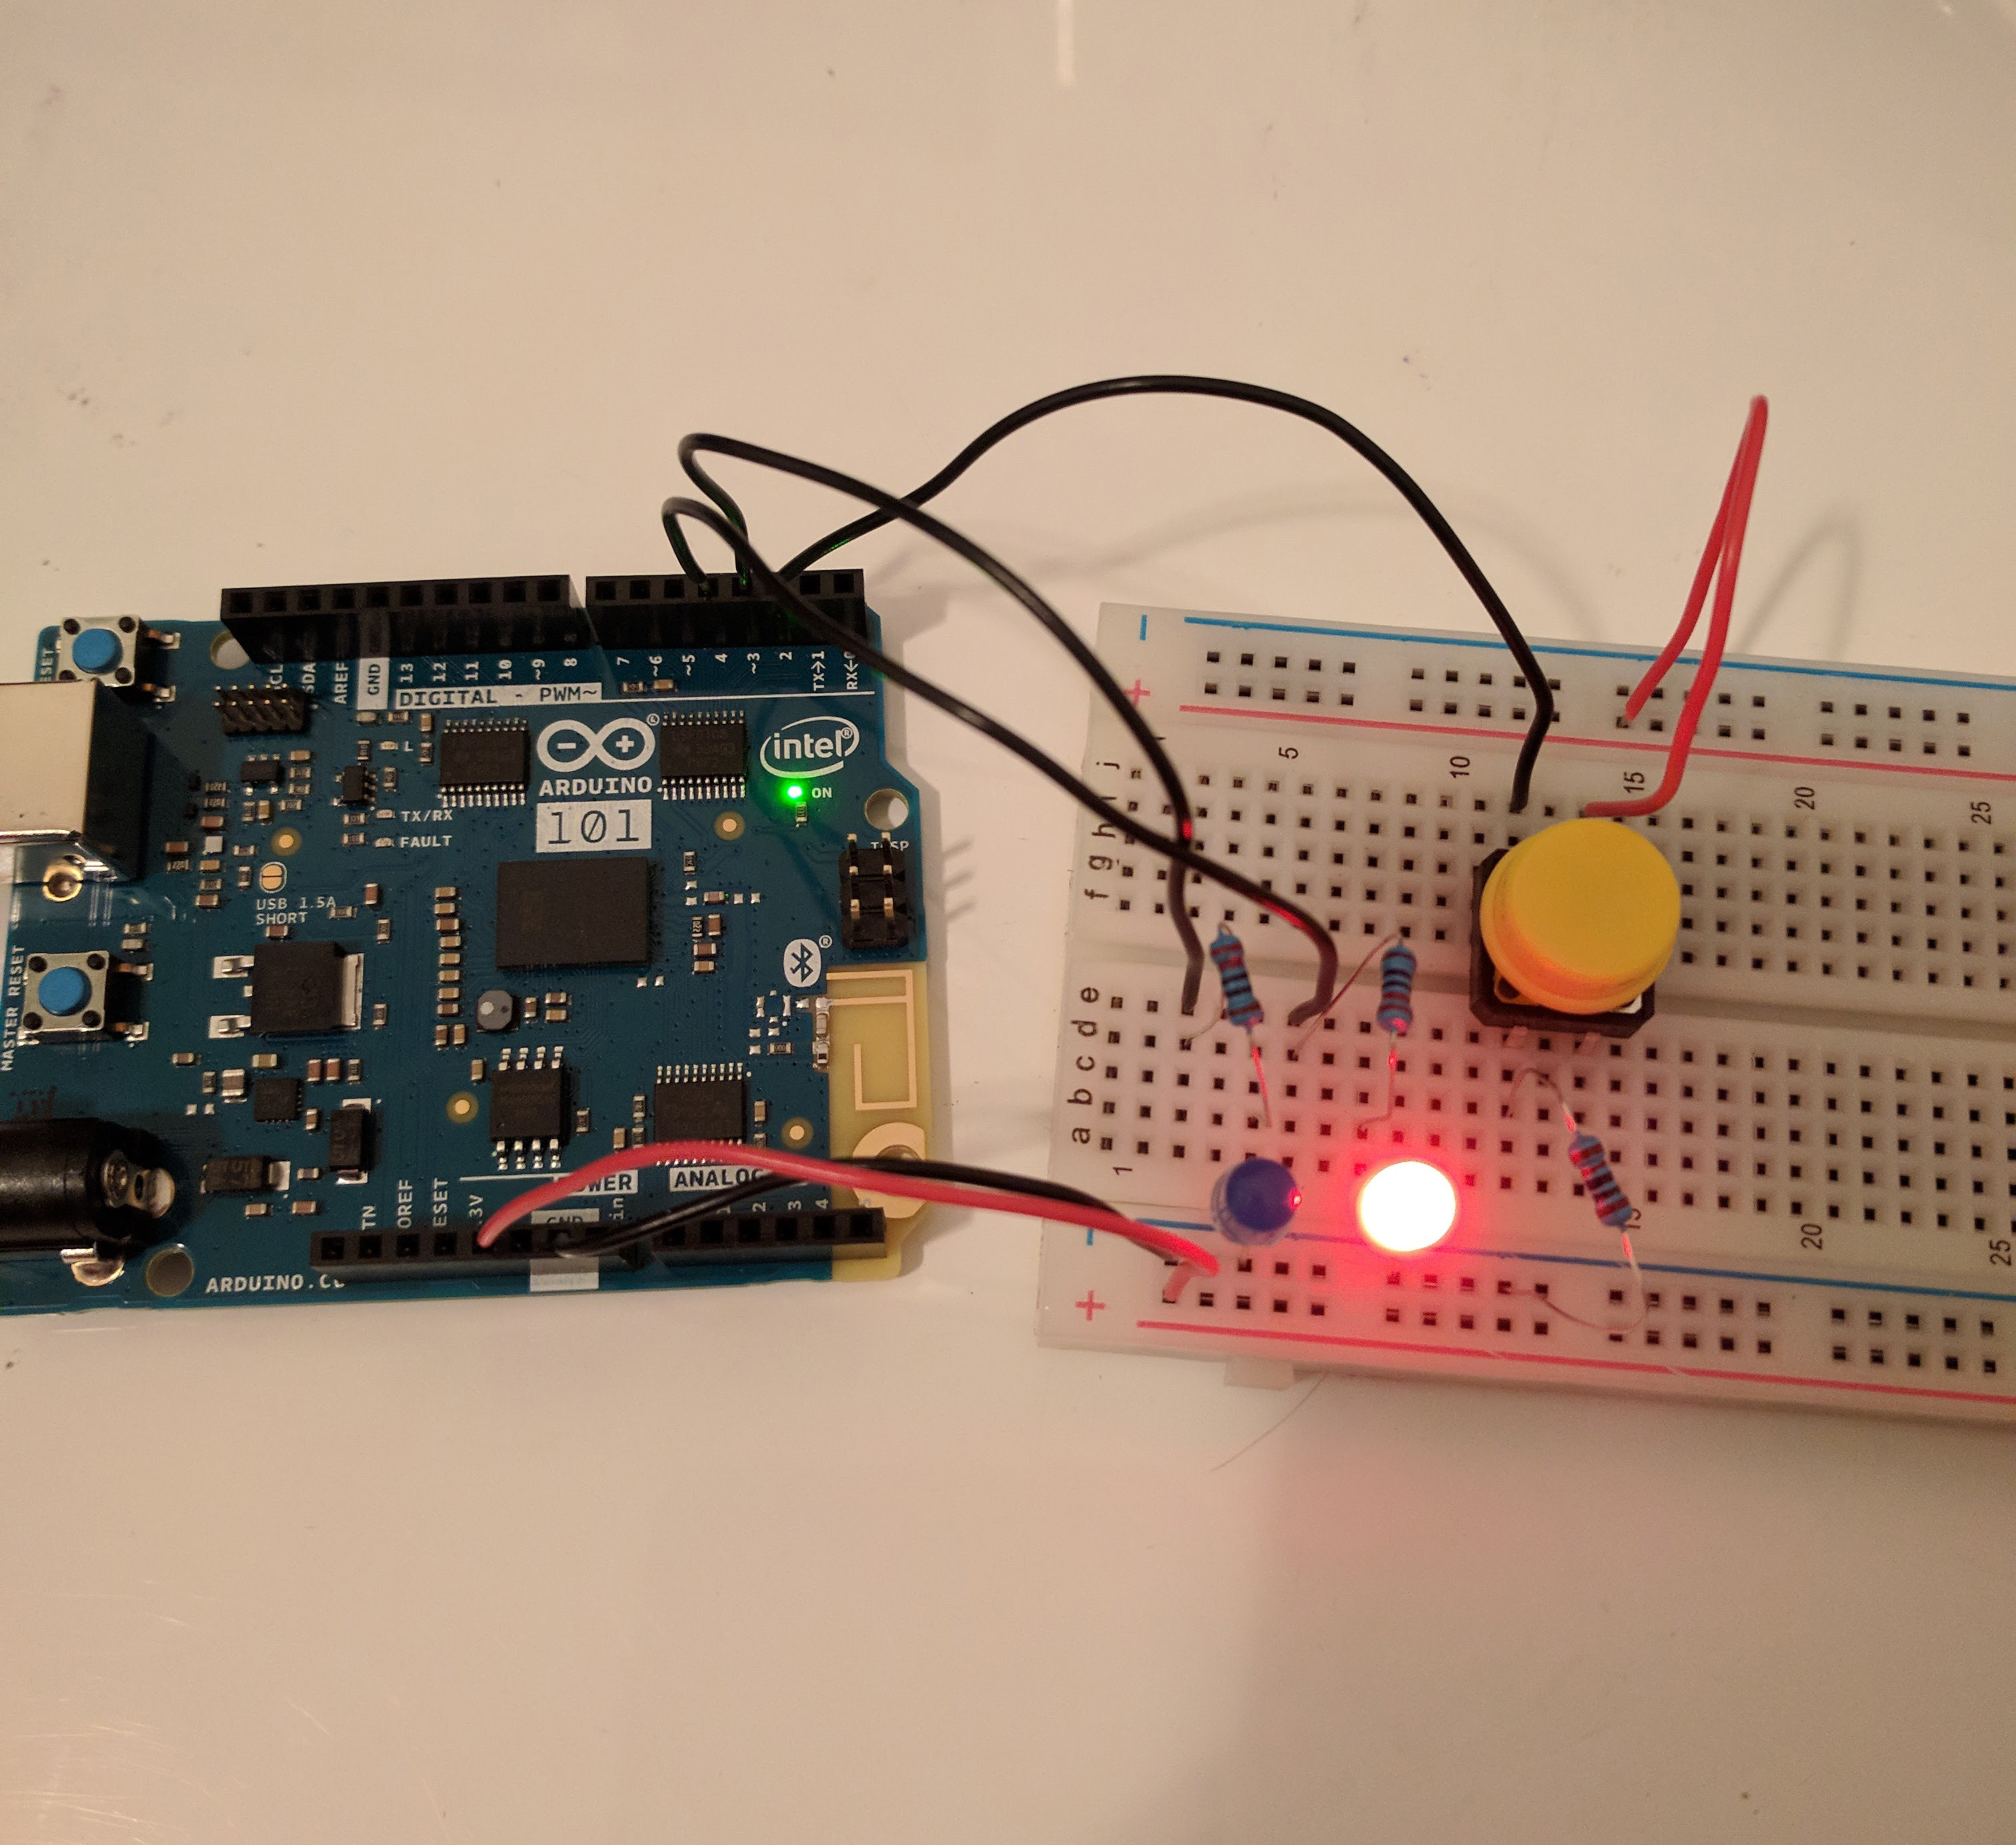
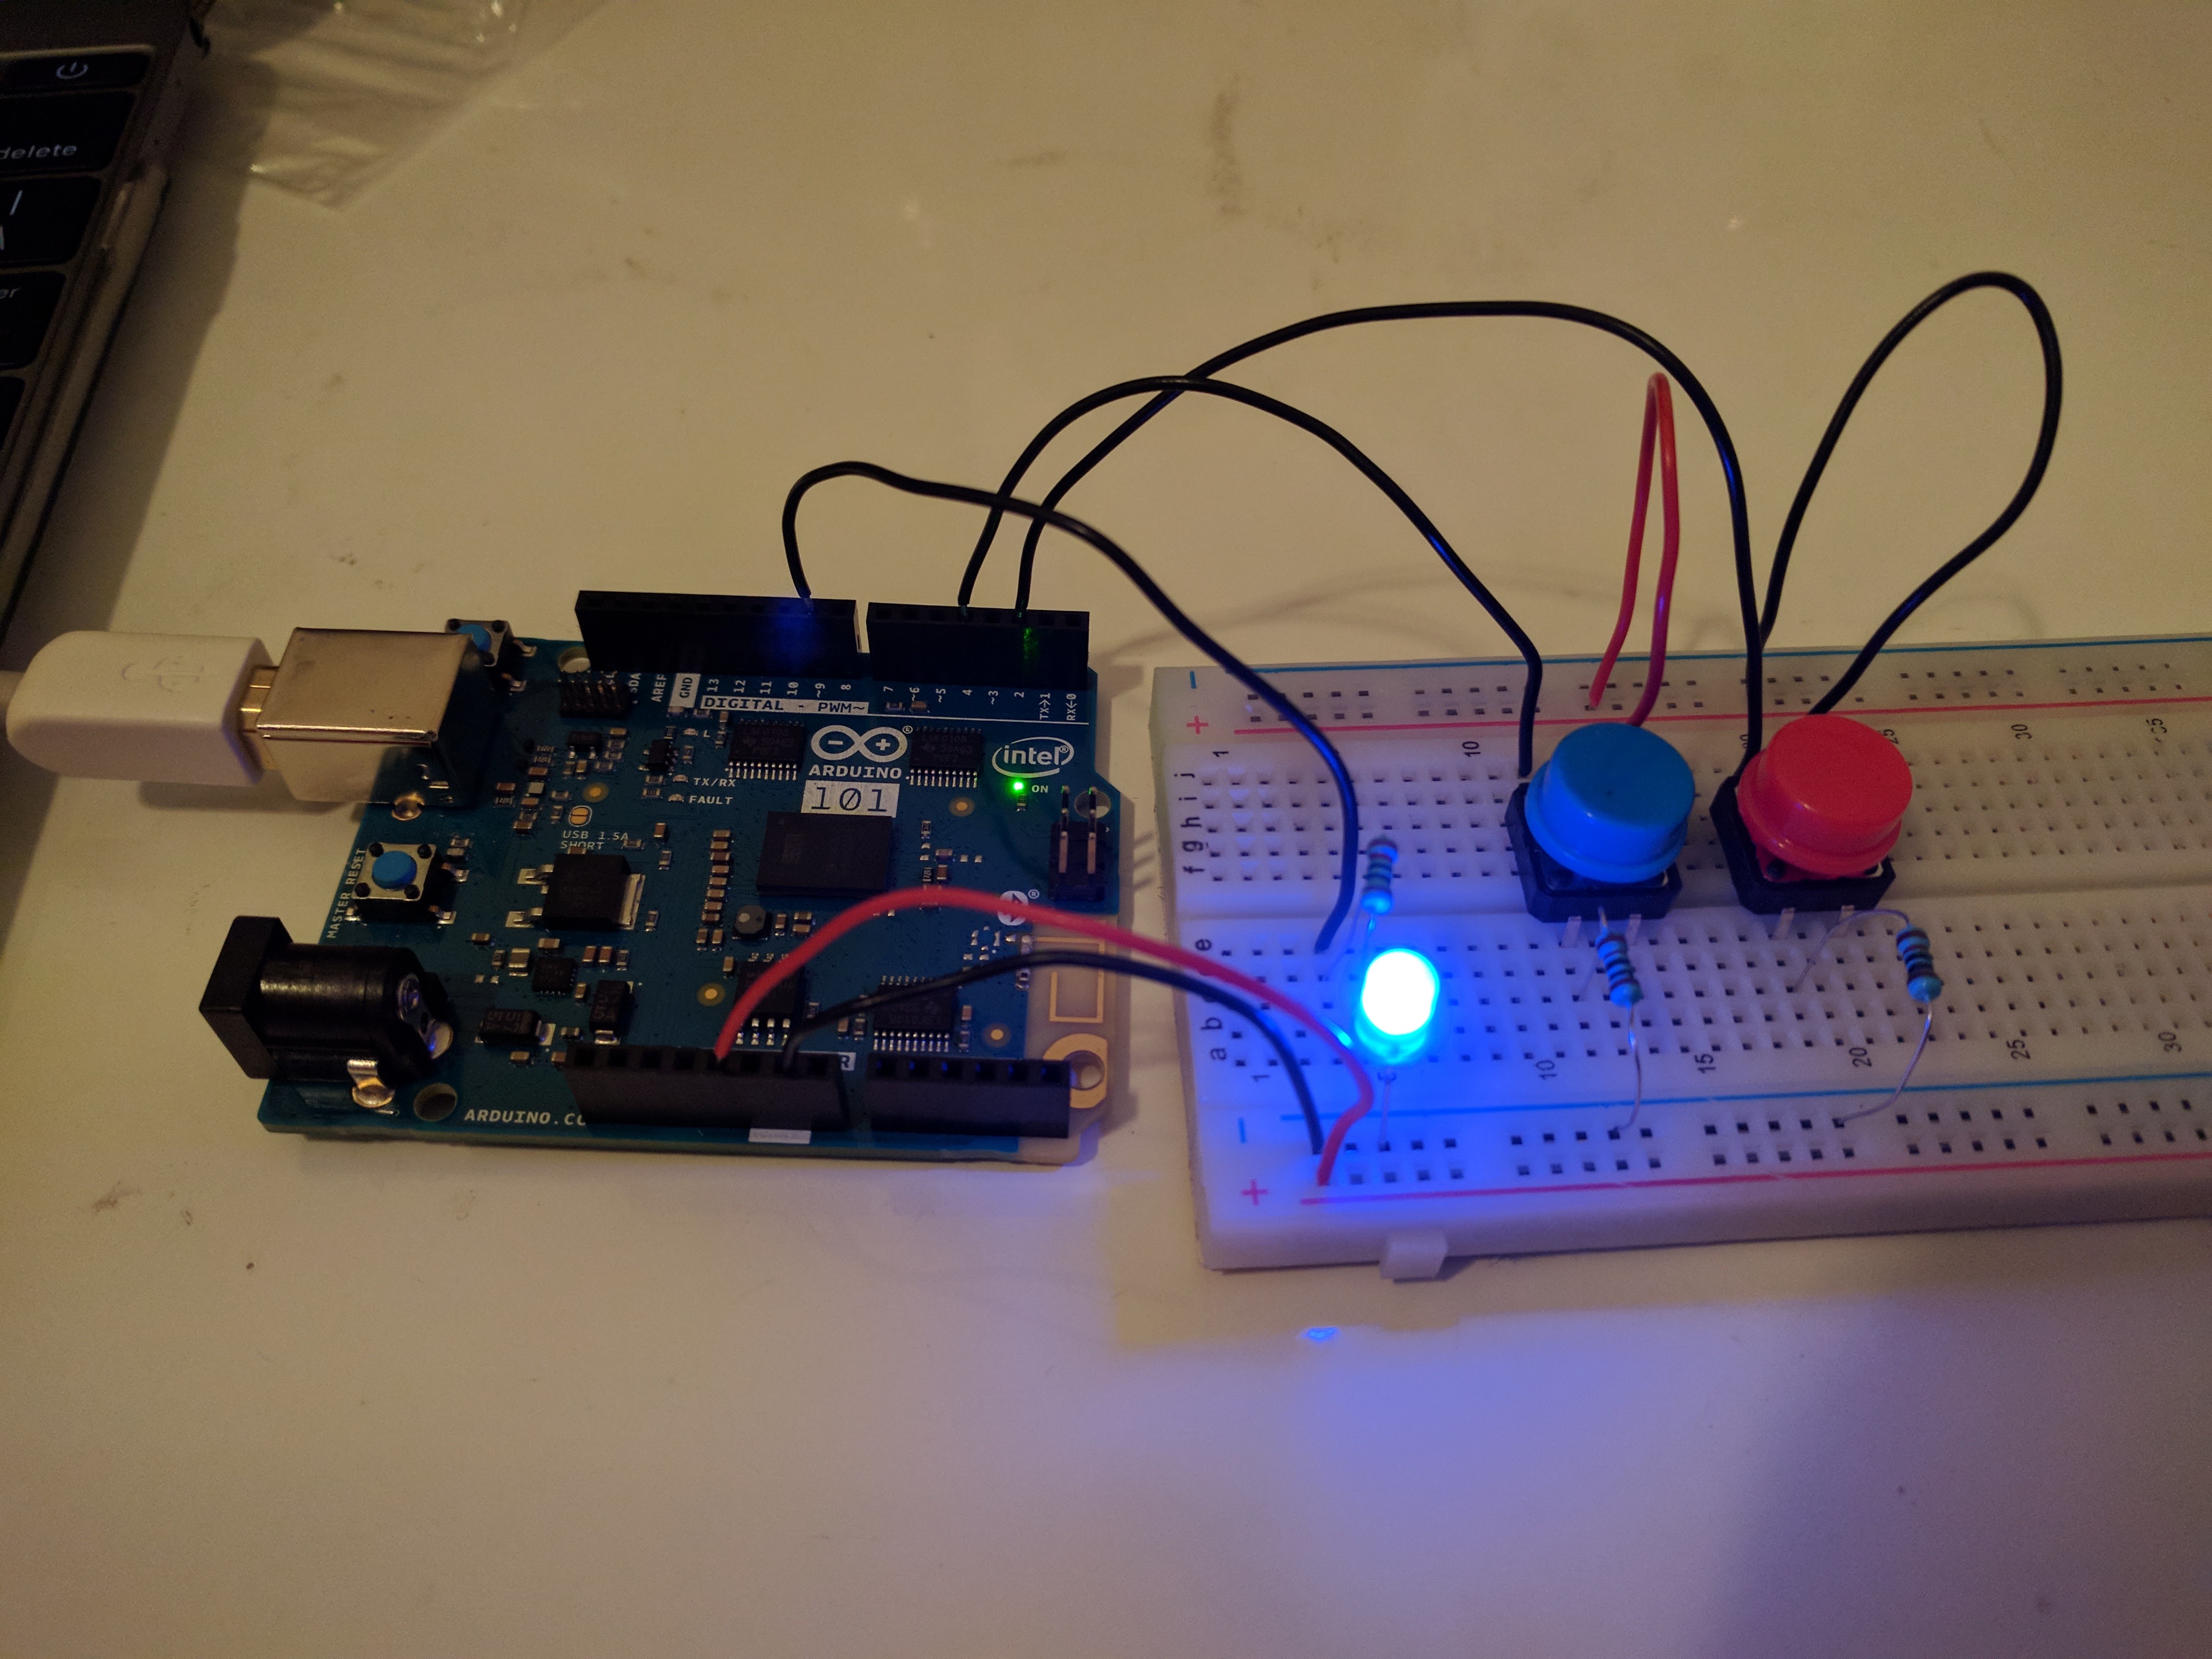
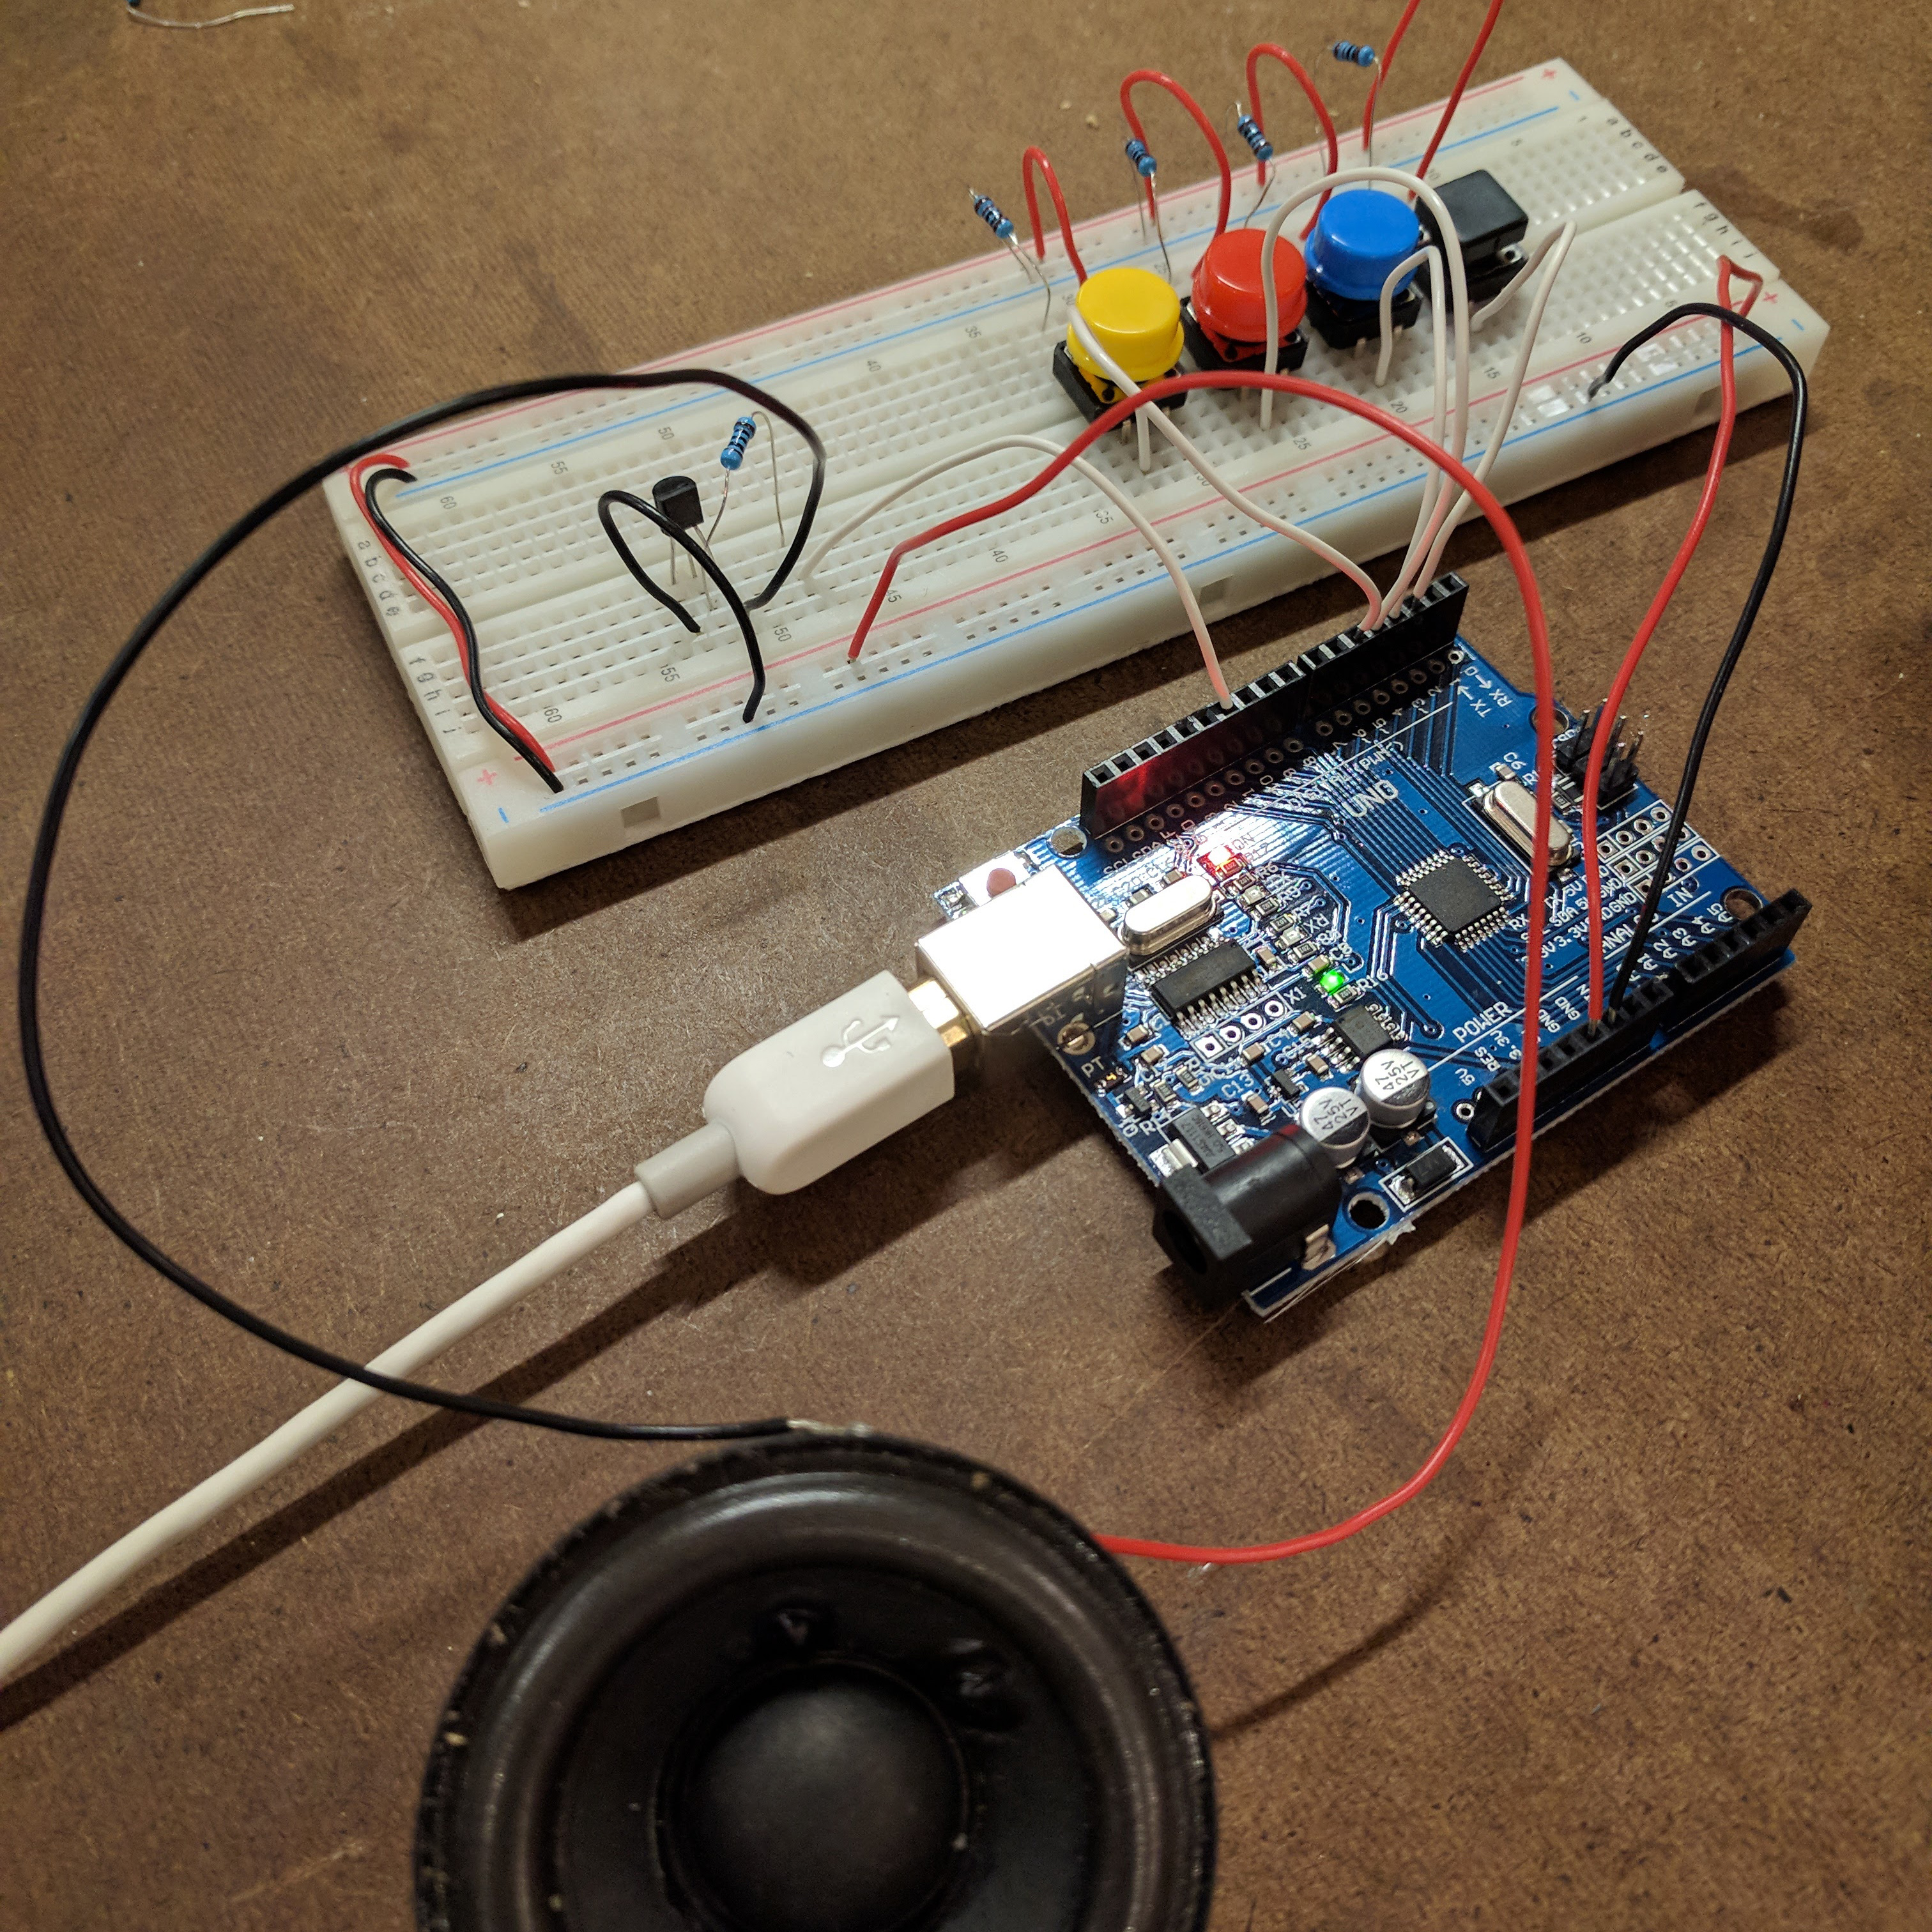
This circuit changes which LED lights up based on whether the switch is pushed down or not. I combined this idea with the Arduino tutorial ‘fade’ example. In this example, an increasing and decreasing brightness value is passed to an LED, fading it brighter and then dimmer.
My application has 2 switches and 1 LED. When one switch is pressed, the LED gets brighter (max at brightness value 255). When the other switch is pressed, the LED gets dimmer (min at brightness value 0).
Circuit and connections with LED shown at max brightness:
The LED is connected at pin 9.
Blue switch1 (brightens) is connected at pin 4.
Red switch2 (dims) is connected at pin 2.
LED brightening while holding down switch1:
LED dimming while holding down switch2:
Full code:
/*
  adapted from arduino fade example and ITP PComp digital input lab
*/

// pin switches are attached to
int switch1 = 4;	// blue in picture
int switch2 = 2;	// red in picture

int led1 = 9;           // the PWM pin the LED is attached to

int brightness = 0;    // how bright the LED is
int fadeAmount = 5;    // how many points to fade the LED by

// the setup routine runs once when you press reset:
void setup() {
  // declare LED outputs
  pinMode(led1, OUTPUT);

  // declare switch inputs
  pinMode(switch1, INPUT);
  pinMode(switch2, INPUT);
}

// the loop routine runs over and over again forever:
void loop() {
    // set the brightness of LEDs
    analogWrite(led1, brightness);

  if (digitalRead(switch1) == LOW) {
    // increase brightness
    if(brightness <= 250){
      brightness = brightness + fadeAmount;
     delay(30);
    }
  }

  if (digitalRead(switch2) == LOW) {
    // decrease brightness
    if(brightness >= 5){
      brightness = brightness - fadeAmount;
      delay(30);
    }
  }
}
Interaction is whenever a user does an action onto something (another user, a program, object, etc.) and receives meaningful feedback. There should be a loop in which the first user processes the feedback and then makes a decision and commits an action again. The feedback should be detailed enough that the user has to be mentally engaged to process it.


 I made a sample based instrument using Arduino Uno and the